
 Appliances
 Agri Inputs
 Auto Components & Accessories
 Beauty & Personal Care
 Electronics
 Fashion
 Grocery
 Gift Cards
 Home & kitchen
 Health & Wellness
 Vehicles & Automotives
 Books & Stationary
 Pet Care
 Toys & Games
 Contact Us
Shopify Channel
Shopify is a popular web application used to create customisable eCommerce storefronts. However, its complexity and expensive add-ons make it a "far from ideal" platform for typical Indian sellers. Shopify Channel integration allows you to connect to your Shopify seller account via API & synchronise your entire product catalogue to your Mystore seller account. Mystore charges no upfront costs or subscription fees. Users can leverage its "pay as you sell" model to scale their business exponentially.
Here, we illustrate integrating Mystore with your Shopify account to optimise your product management capabilities. With this step-by-step tutorial, vendors can seamlessly incorporate their Shopify application with Mystore's Dashboard in minutes!
One-Time Sync
Integrating Shopify Custom App With Mystore:
Step 1: Log in to your Shopify Admin Homepage.
Step 2: Click on the "Settings" tab on the left.

Step 3: Next, Click on the "Apps and Sales Channels" tab on the left.

Step 4: From the "Apps and sales channels", on the top right click the "Develop apps for your store" button.

Step 5: Then, click on the "Create an app" button.

Step 6: Fill in the the App Name for (e.g shopifyMystore app) and "App developer" section with the developer credentials. Then, select the "Create app" button.

Step 7: Click on "API Credentials" tab.

Step 8: click on "Configure admin api scopes".

Give apps "read" or "read and write" access from various admin access scopes. That way, all Shopify data can be synced to the StoreHippo admin panel.
Read Access: Fulfilment service and Inventory.
Read and Write Access: Assigned fulfilment orders, Products, Product listings, Customers, Draft orders, Discounts, Locations, Marketing, Orders, Order editing, Third-party fulfilment orders, Store content, etc.
Step 9: click on filter and type read_products and search for it

Step 10: select read_products and click on save.

Step 11: Then, click on API credentials and click the "Install App" button.

Step 12: Confirm and click on "Install" button.

Step 13: After clicking, you can retrieve API credentials (Admin API Access Token, API Key, API Secret Key).
Important Note: Once you've retrieved your API credentials, the access token can only be viewed once. To re-access the API token, simply uninstall and reinstall the custom app. Also, be sure NEVER to share your API credentials publicly.

Integrating Shopify With Mystore Admin Panel:
Shopify sellers can migrate their entire product catalogue from Shopify to their Mystore seller account in just a few clicks. The seamless process can enable users to leverage Mystore's advanced, feature-rich Dashboard to make their selling journey quick and hassle-free. Here's how the channel integration works:
Step 1: Log in to your Mystore admin account.
Step 2: Go to "Channels" on the Dashboard as highlighted.
Step 3: Select "Shopify" from the multiple available channels.

Step 4: You will then be directed to the 'Channel Settings' section, asking you to enter your "Shop Name" and "API Access Token". Also enable "Product sync" and "One time" as shown below:

Note:
The shop name that you will be adding on the Mystore channel section should be taken from the URL present on the shopify admin. For example, if the Shopify URL is “https://johns-apparel.myshopify.com”
Then the Shop Name will be : johns-apparel
Step 5: Finally, click on "Add Channel". Your Shopify Channel is now successfully added to your Mystore admin panel.
.jpg)
Once your channel is successfully configured, you can review Channel Stats and Channel Records.
Note: "Channel Stats" can be accessed on your Mystore admin panel, as illustrated here. The entry confirms that all your Shopify products have successfully migrated to Mystore.

"Channel Records" contains the status of the migration of each product entry. All product records are first added to this entity and then processed individually. The "Channel Records" section is updated only a few minutes after the latest entry.

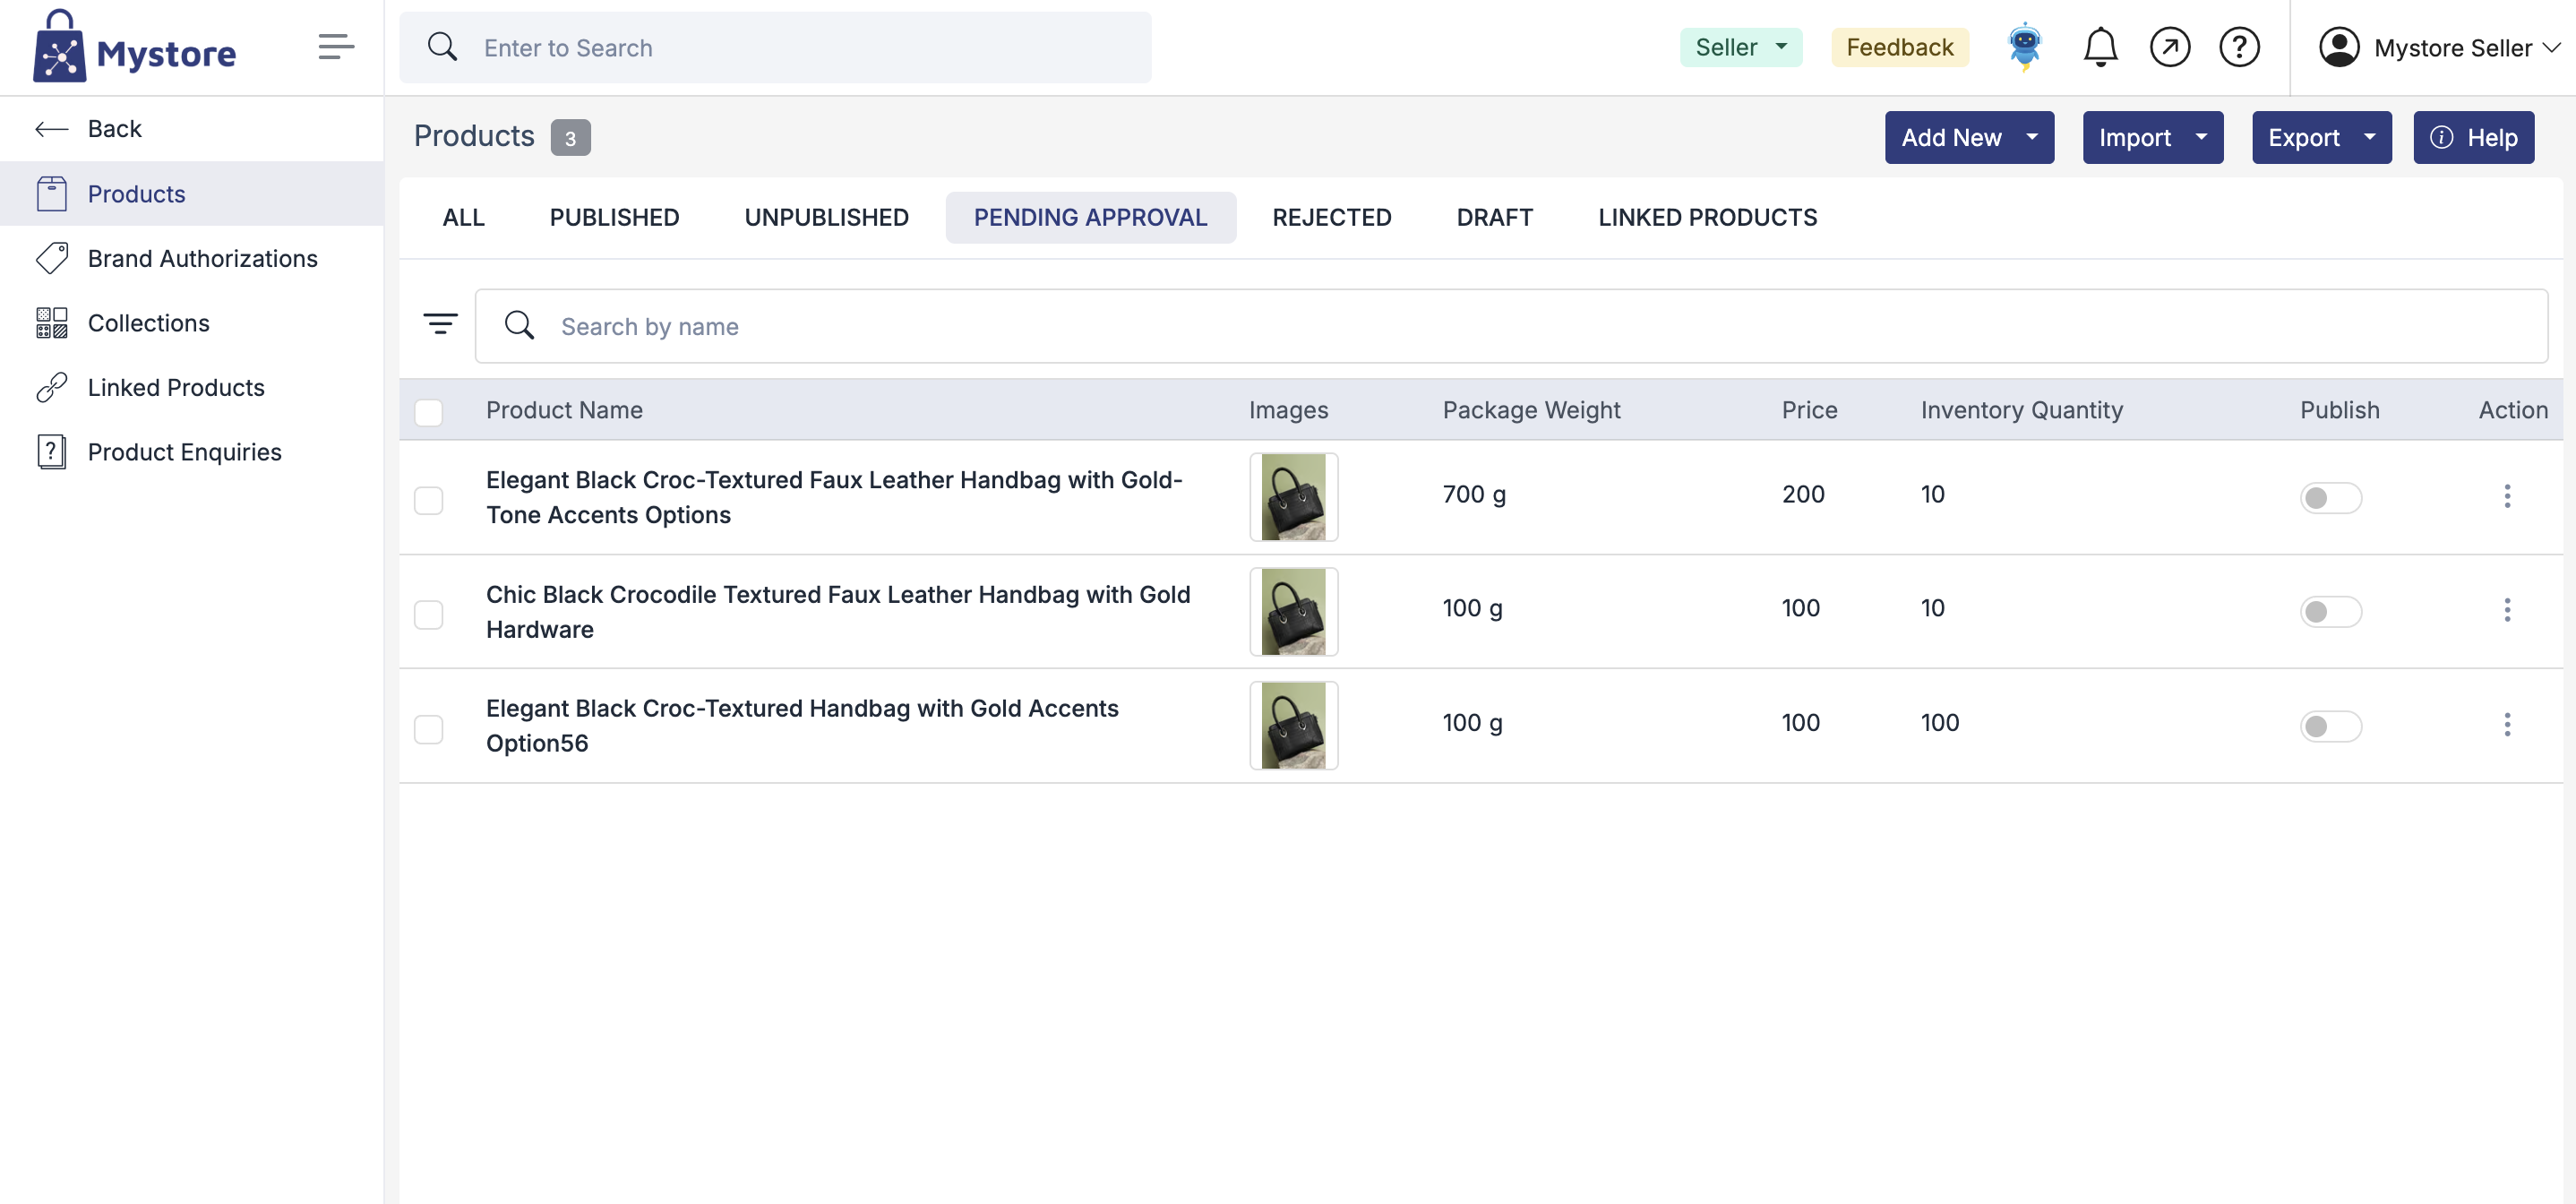
Step 6: To ascertain that products have been successfully fetched from Shopify to Mystore, go to Products > Pending Approval. All fetched products will first appear here. Once required details are updated via CSV and approved by the Mystore team, they will move to Published.
Product Migration Flow
When integration is complete, products do not go directly to Published. The process is as follows:
- Pending Approval: Once the integration happens, all fetched products first appear under Pending Approval.
- CSV Updates: Some product details may not be fetched automatically during integration. These details are updated via a CSV file based on the product category.
- Review & Approval: After the necessary details are updated, the products are reviewed and approved by the Mystore team.
- Published: Only after approval will the products move to the Published tab, making them live on your storefront.
Products Migrated Successfully!
Congratulations, your Shopify Channel has been successfully integrated with Mystore. Also, stay tuned, as we are about to launch "Customer migration" and "Order Migration" features for Shopify users (and other platforms).
Important Note: As you continue to add products to your Shopify store, simply select your previously integrated channel and then update the same on the Mystore account to automatically migrate all products onto your Mystore admin panel.
Real-Time Sync
Integrating Shopify Custom App With Mystore:
Step 1: Log in to your Shopify Admin Homepage.
Step 2: Click on the "Settings" tab on the left.
Step 3: Next, Click on the "Apps and Sales Channels" tab on the left.
Step 4: From the "Apps and sales channels", on the top right click the "Develop apps for your store" button.
Step 5: Then, click on the "Create an app" button.
Step 6: Fill in the the App Name for (e.g shopifyMystore app) and "App developer" section with the developer credentials. Then, select the "Create app" button.
Step 7: Click on "API Credentials" tab. Update the API Headers with the following permissions to ensure proper data access and synchronization.
Headers to Update:
write_customers, read_customers,
write_fulfillments, read_fulfillments,
write_inventory, read_inventory,
write_orders, read_orders,
write_assigned_fulfillment_orders, read_assigned_fulfillment_orders,
write_third_party_fulfillment_orders, read_third_party_fulfillment_orders,
write_custom_fulfillment_services, read_custom_fulfillment_services,
write_merchant_managed_fulfillment_orders, read_merchant_managed_fulfillment_orders,
write_products, read_products
Step 8: click on "Configure admin api scopes".
Give apps "read" or "read and write" access from various admin access scopes. That way, all Shopify data can be synced to the StoreHippo admin panel.
Read Access: Fulfilment service and Inventory.
Read and Write Access: Assigned fulfilment orders, Products, Product listings, Customers, Draft orders, Discounts, Locations, Marketing, Orders, Order editing, Third-party fulfilment orders, Store content, etc.
Step 9: click on filter and type read_products and search for it
Step 10: select read_products and click on save.
Step 11: Then, click on API credentials and click the "Install App" button.
Step 12: Confirm and click on "Install" button.
Step 13: After clicking, you can retrieve API credentials (Admin API Access Token, API Key, API Secret Key).
Important Note: Once you've retrieved your API credentials, the access token can only be viewed once. To re-access the API token, simply uninstall and reinstall the custom app. Also, be sure NEVER to share your API credentials publicly.
Integrating Shopify With Mystore Admin Panel:
Shopify sellers can migrate their entire product catalogue from Shopify to their Mystore seller account in just a few clicks. The seamless process can enable users to leverage Mystore's advanced, feature-rich Dashboard to make their selling journey quick and hassle-free. Here's how the channel integration works:
Step 1: Log in to your Mystore admin account.
Step 2: Go to "Channels" on the Dashboard as highlighted.
Step 3: Select "Shopify" from the multiple available channels.
Step 4: You will then be directed to the 'Channel Settings' section, asking you to enter your "Shop Name" and "API Access Token". Also enable "Product sync" and "One time" as shown below:
Note:
The shop name that you will be adding on the Mystore channel section should be taken from the URL present on the shopify admin. For example, if the Shopify URL is “https://johns-apparel.myshopify.com”
Then the Shop Name will be : johns-apparel
Step 5: Under Sync settings, enable Inventory Sync, Fulfillment Update Sync. In Product Sync, enable Real-Time to make sure all the changes you will be doing in shopify will be synced on Mystore too.

Step 6: Finally, click on "Add Channel". Your Shopify Channel is now successfully added to your Mystore admin panel.
Once your channel is successfully configured, you can review Channel Stats and Channel Records.
Note: "Channel Stats" can be accessed on your Mystore admin panel, as illustrated here. The entry confirms that all your Shopify products have successfully migrated to Mystore.
"Channel Records" contains the status of the migration of each product entry. All product records are first added to this entity and then processed individually. The "Channel Records" section is updated only a few minutes after the latest entry.
Step 7: To ascertain that products have been successfully fetched from Shopify to Mystore, go to Products > Pending Approval. All fetched products will first appear here. Once required details are updated via CSV and approved by the Mystore team, they will move to Published.
Product Migration Flow
When integration is complete, products do not go directly to Published. The process is as follows:
- Pending Approval: Once the integration happens, all fetched products first appear under Pending Approval.
- CSV Updates: Some product details may not be fetched automatically during integration. These details are updated via a CSV file based on the product category.
- Review & Approval: After the necessary details are updated, the products are reviewed and approved by the Mystore team.
- Published: Only after approval will the products move to the Published tab, making them live on your storefront.
Products Migrated Successfully!
Congratulations, your Shopify Channel has been successfully integrated with Mystore. Also, stay tuned, as we are about to launch "Customer migration" and "Order Migration" features for Shopify users (and other platforms).
Important Note: As you continue to add products to your Shopify store, simply select your previously integrated channel and then update the same on the Mystore account to automatically migrate all products onto your Mystore admin panel.