Seller Registration & KYC
To start selling on MyStore through ONDC, you need to register as a seller. Follow these steps carefully to complete your registration.
Seller Registration
Begin the Registration Process
- Go to the MyStore Website.
- Click on the ‘Sell on ONDC’ button located at the top right corner of the homepage.
- From the menu that appears, click on ‘Register as a Seller’.

Verify Your Mobile Number
1. Enter your mobile phone number in the provided field.

2. Click on the ‘Send OTP’ button.

3. You will receive a 4-digit OTP (One-Time Password) on your phone.
4. Enter the received OTP in the input box to verify your number.

Provide Basic Account Information
1. Enter your email address.

2. Choose a password for your account.
- Make sure your password is strong and easy for you to remember, but hard for others to guess.

3. You now have two options depending on whether or not you have a GSTIN.

If You Have a GSTIN (For Sellers with GST)
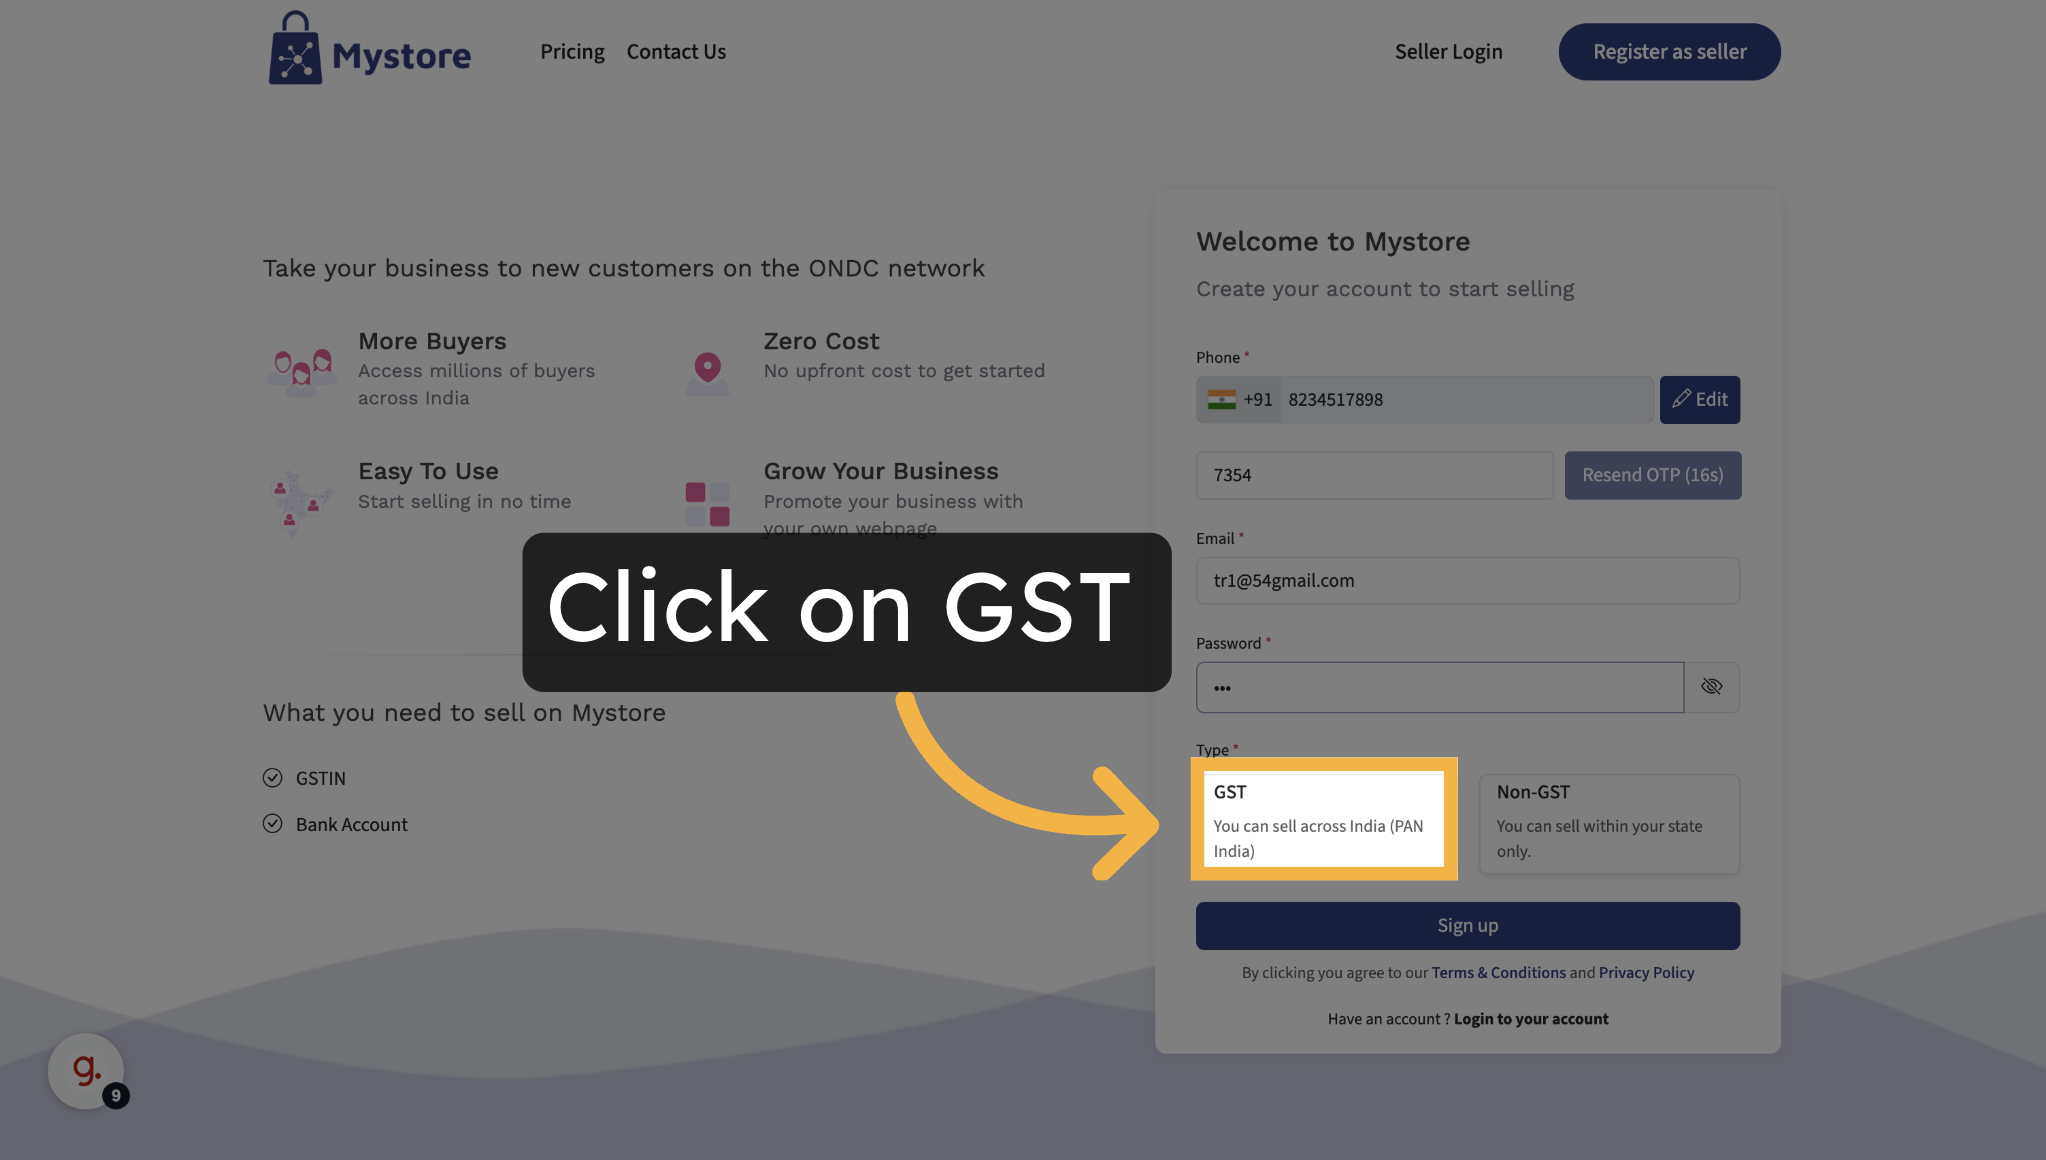
1. Select the ‘GST’ option.
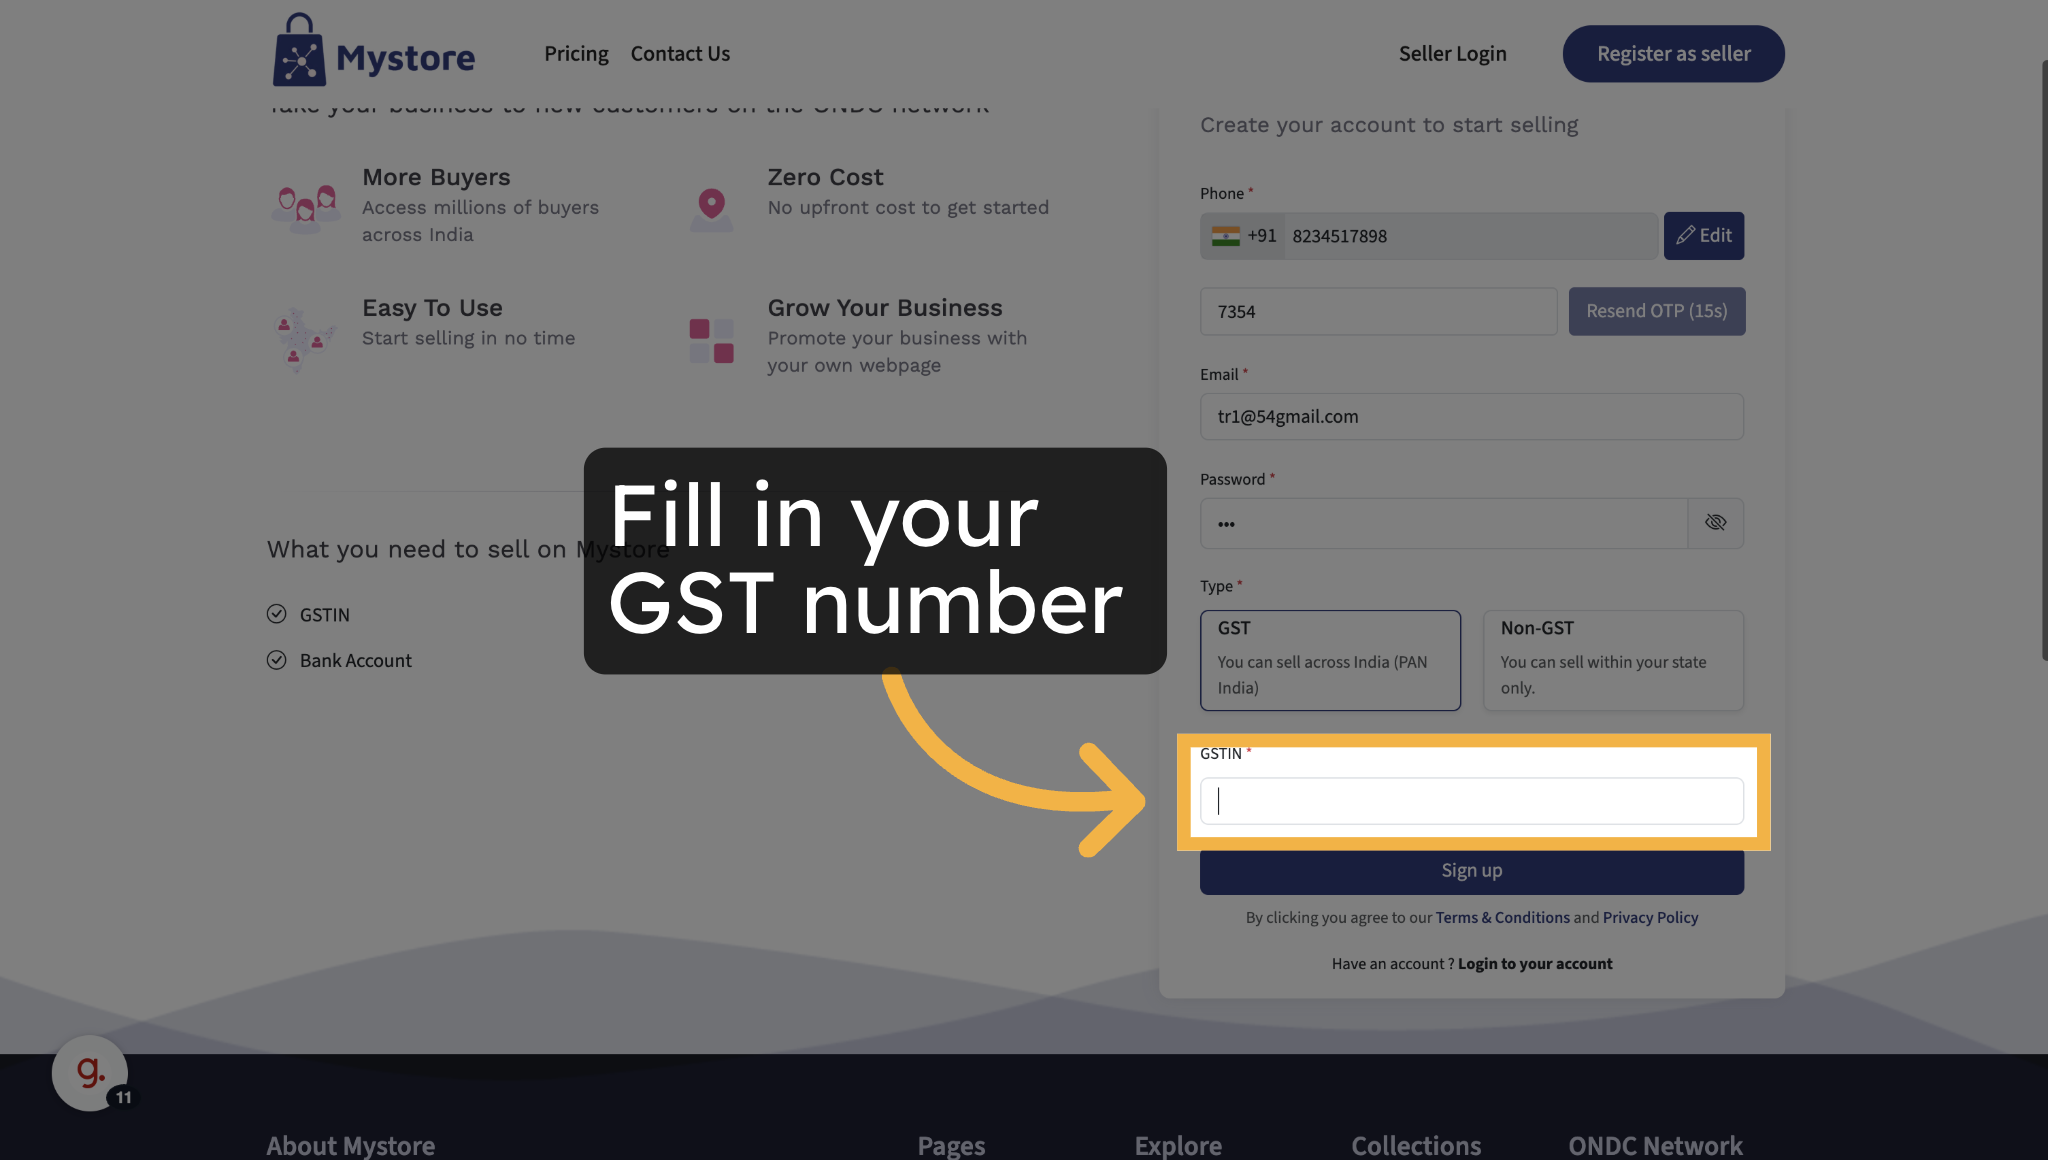
2. Enter your GSTIN (Goods and Services Tax Identification Number).
3. Click on the ‘Sign Up’ button to complete your registration.
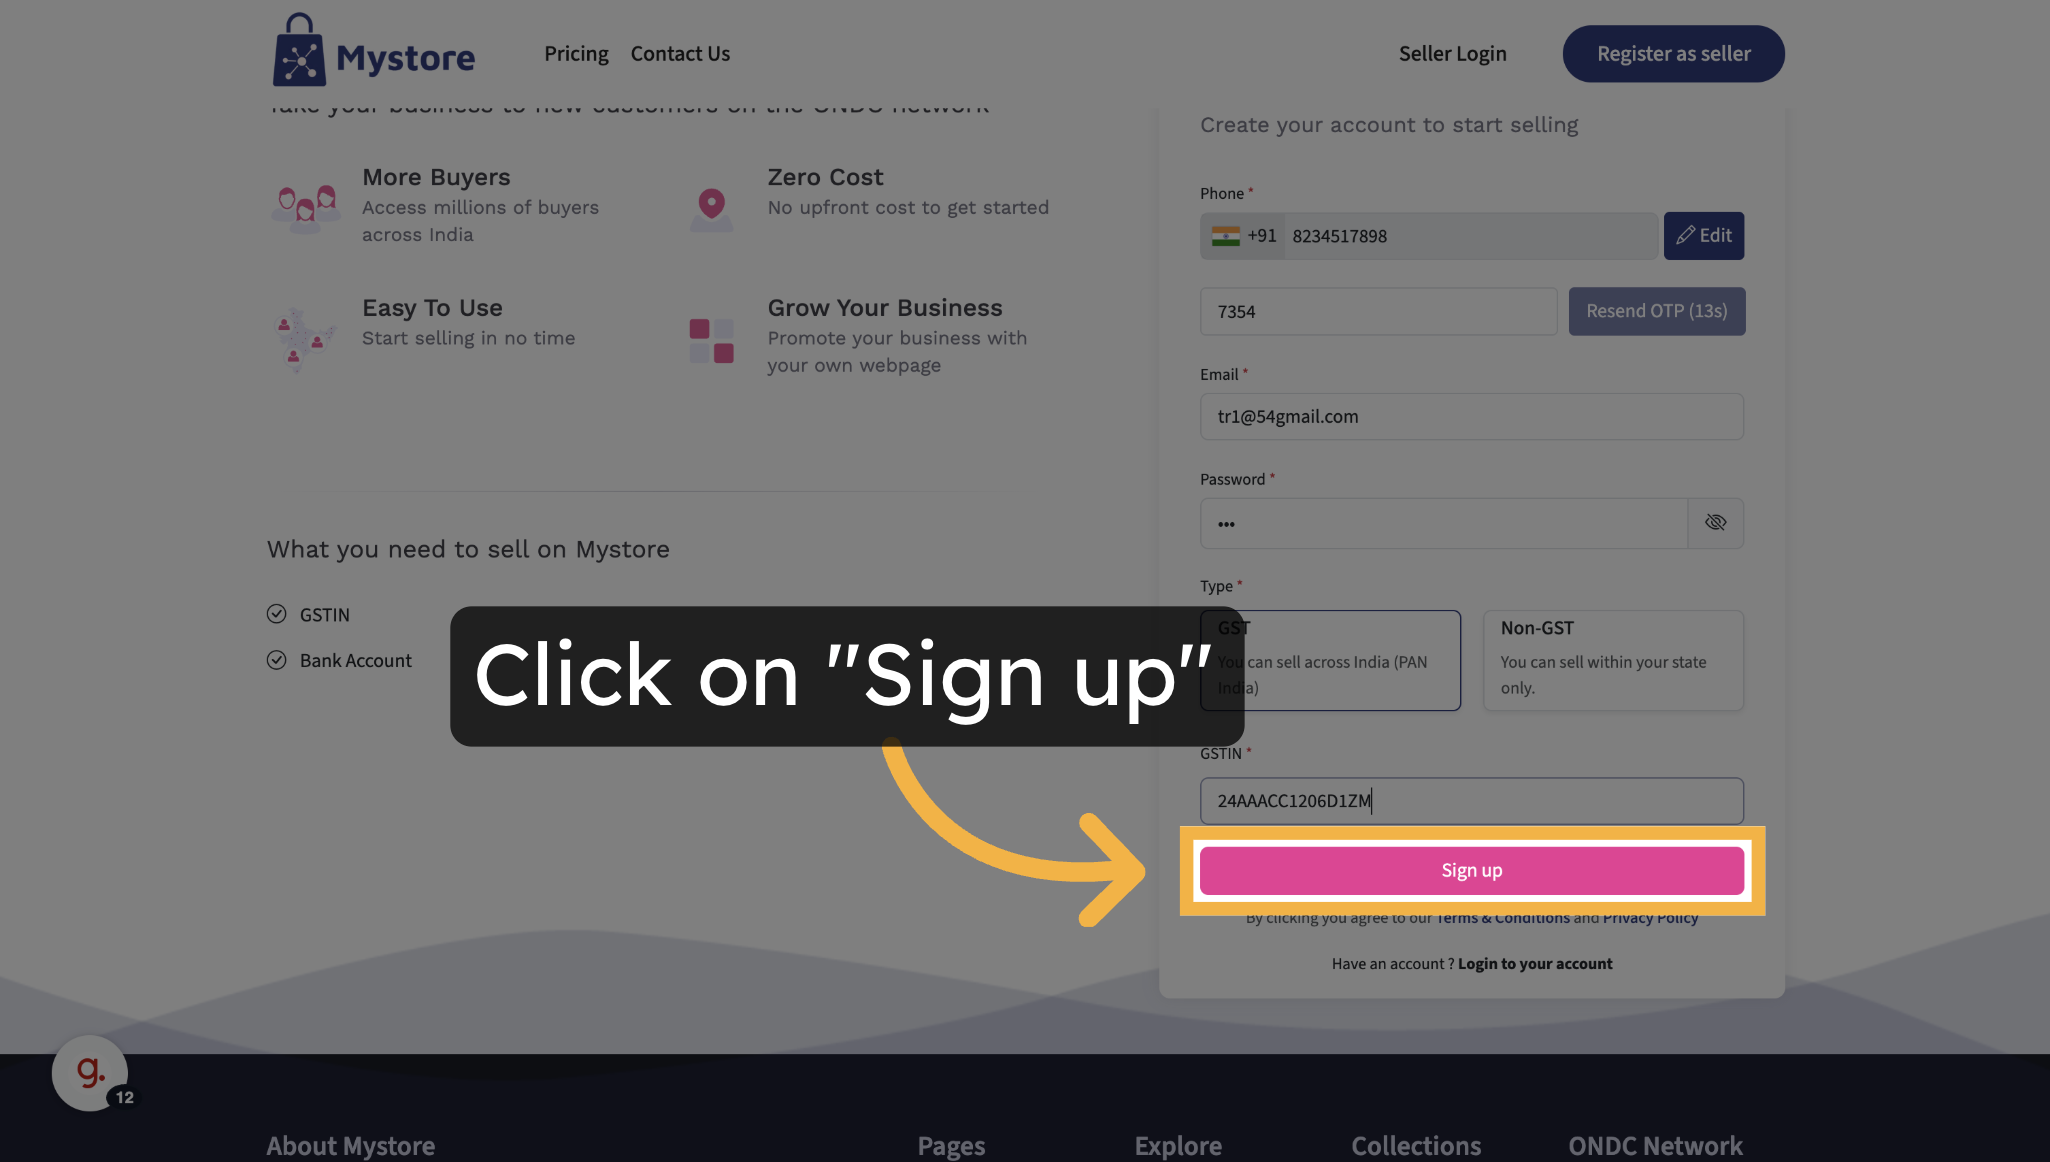
Once submitted, your account will be created and you’ll be able to proceed to the next steps inside the seller portal.
If You Don't Have a GSTIN (For Intra-State Sellers)
If you don’t have a GSTIN, you can still register to sell products within your own state. Here’s how:
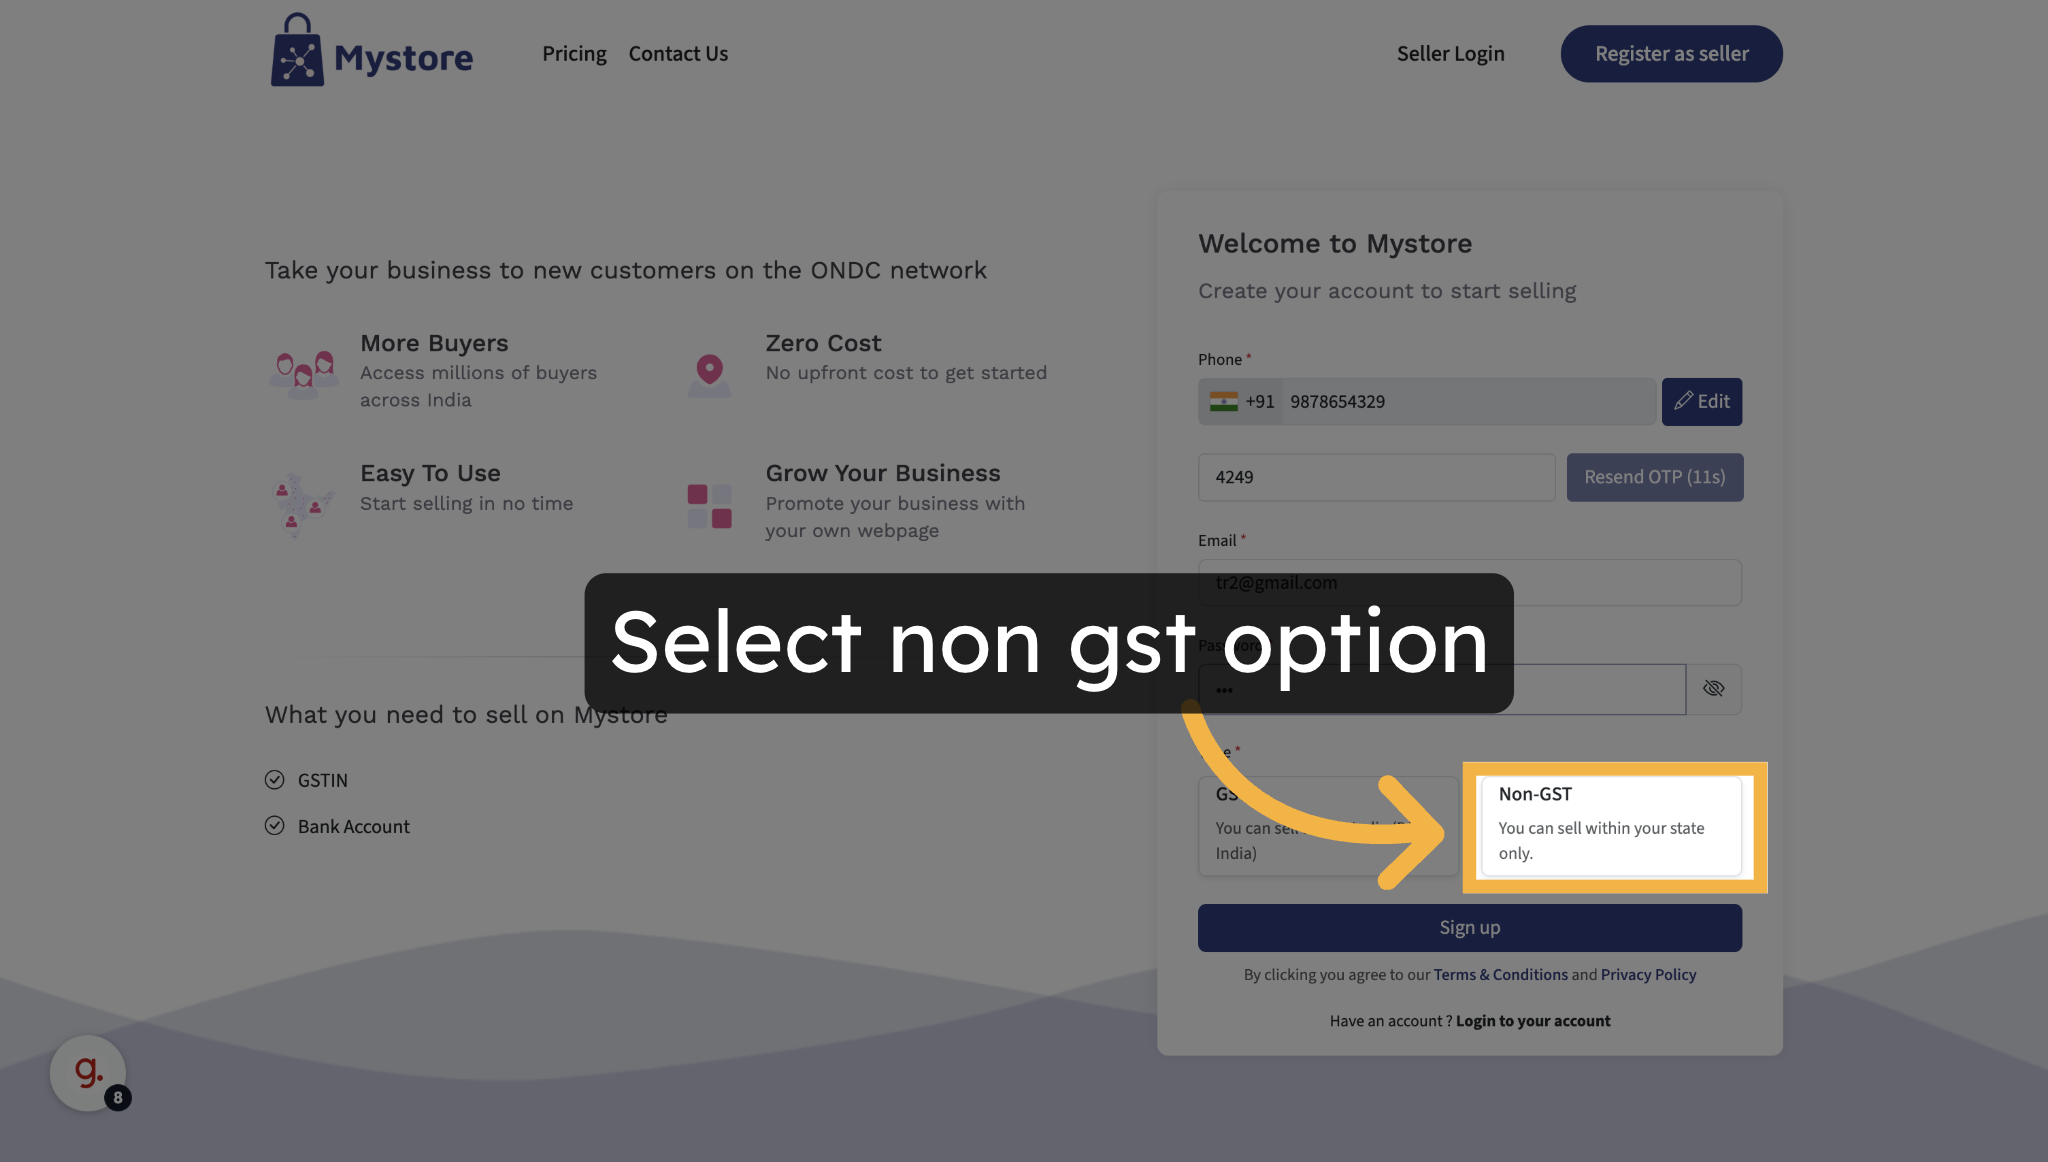
1. Select the ‘Non-GST’ option.
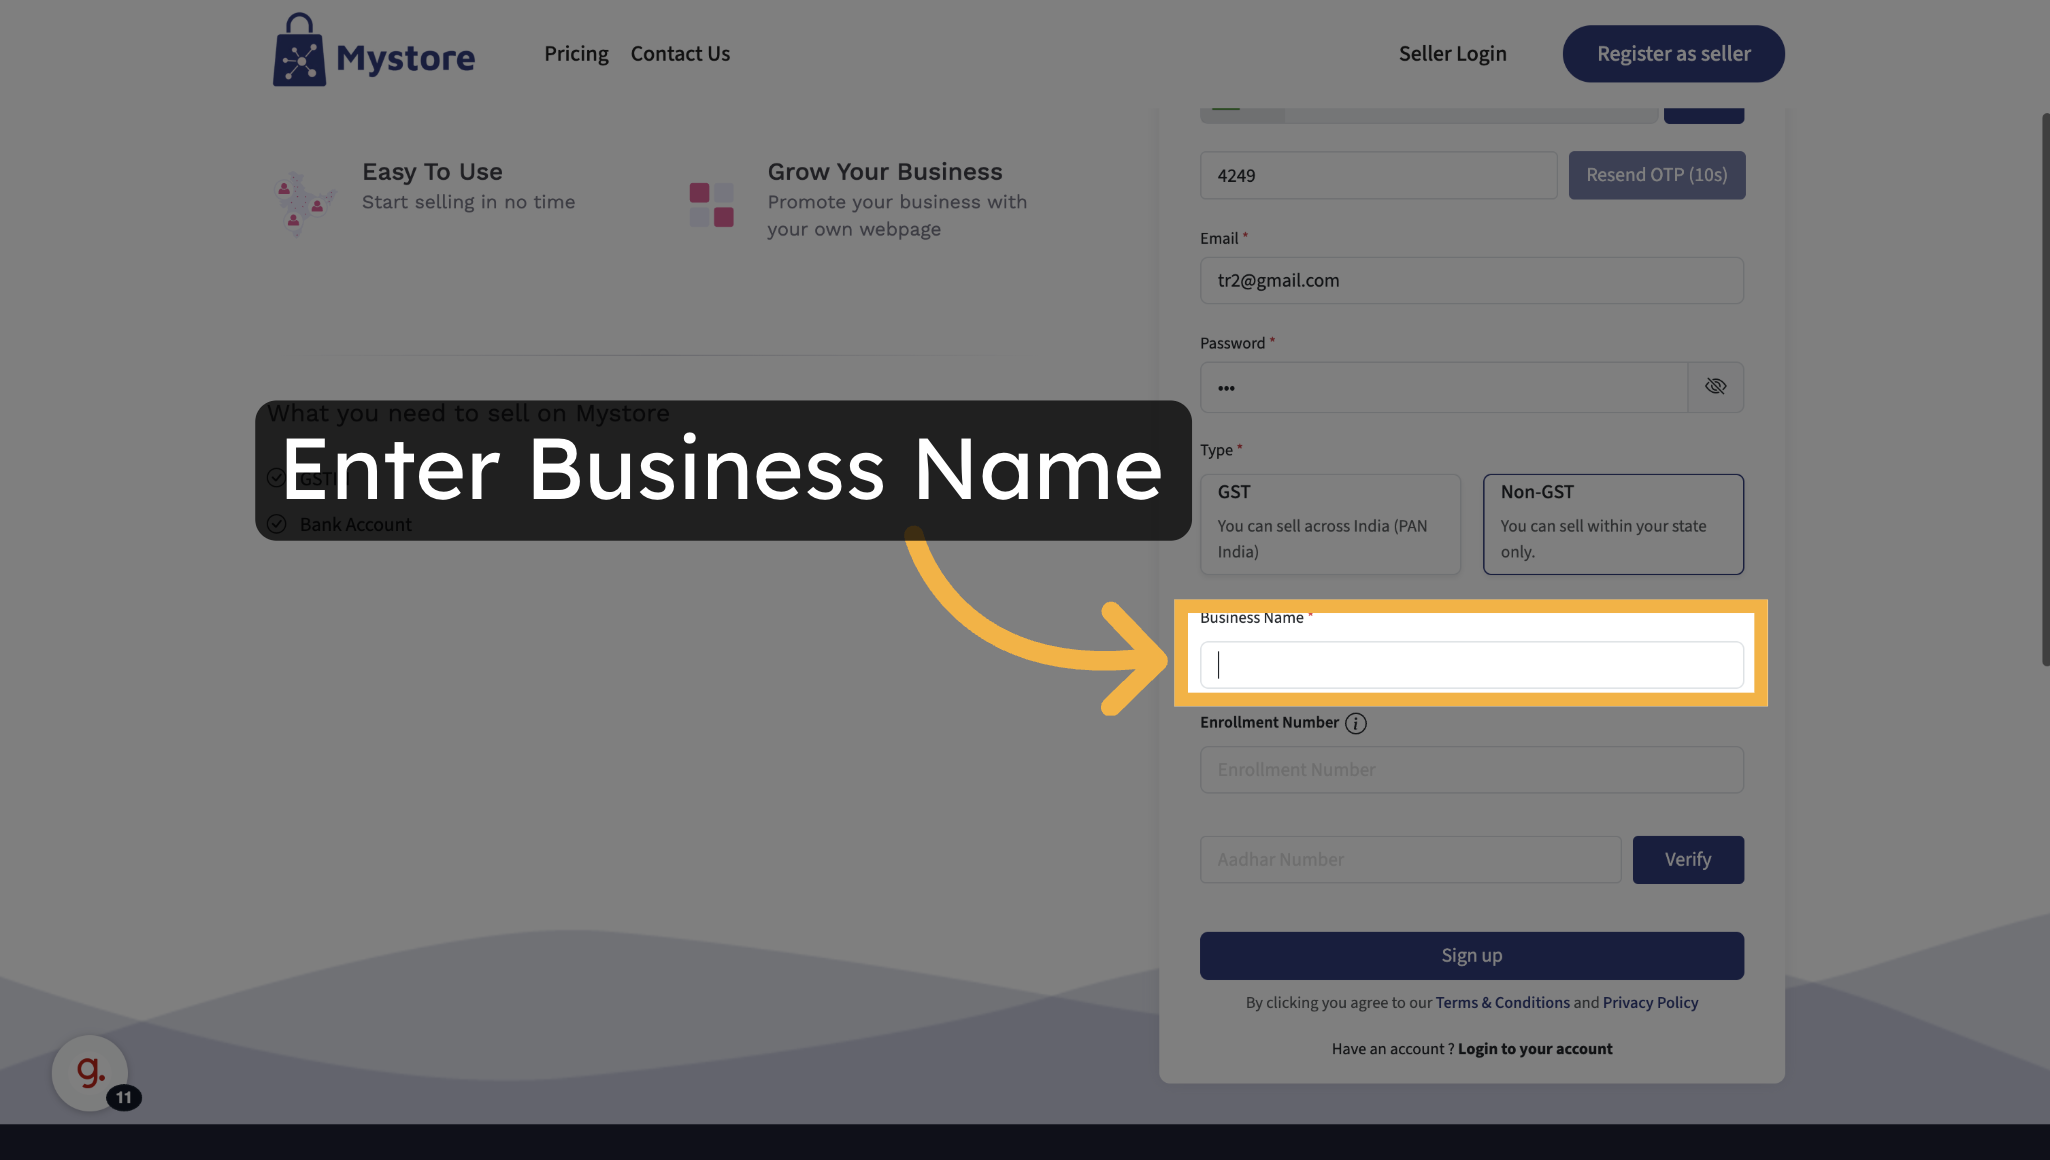
2. Enter the Business name
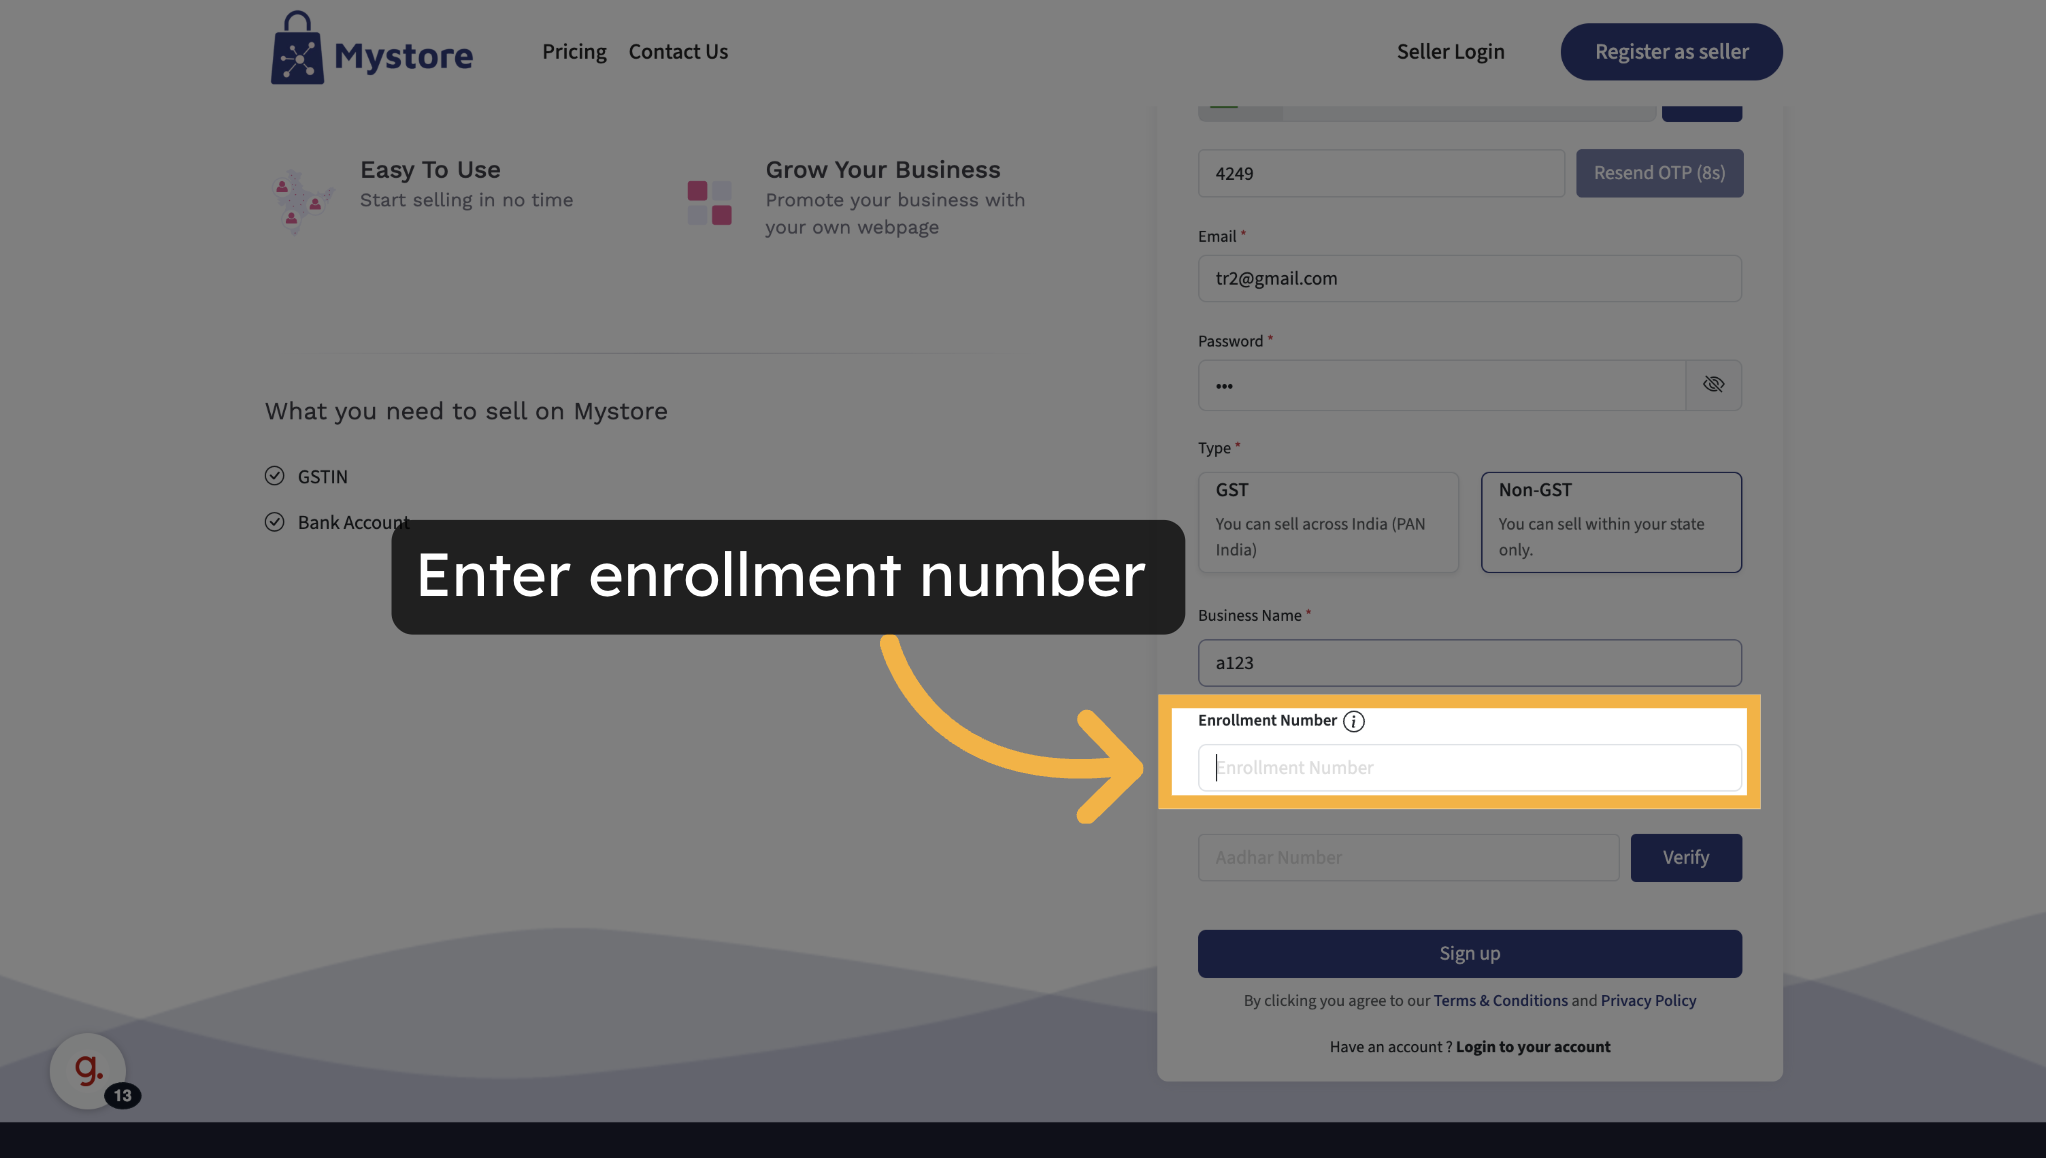
3. Enter the Enrollment number
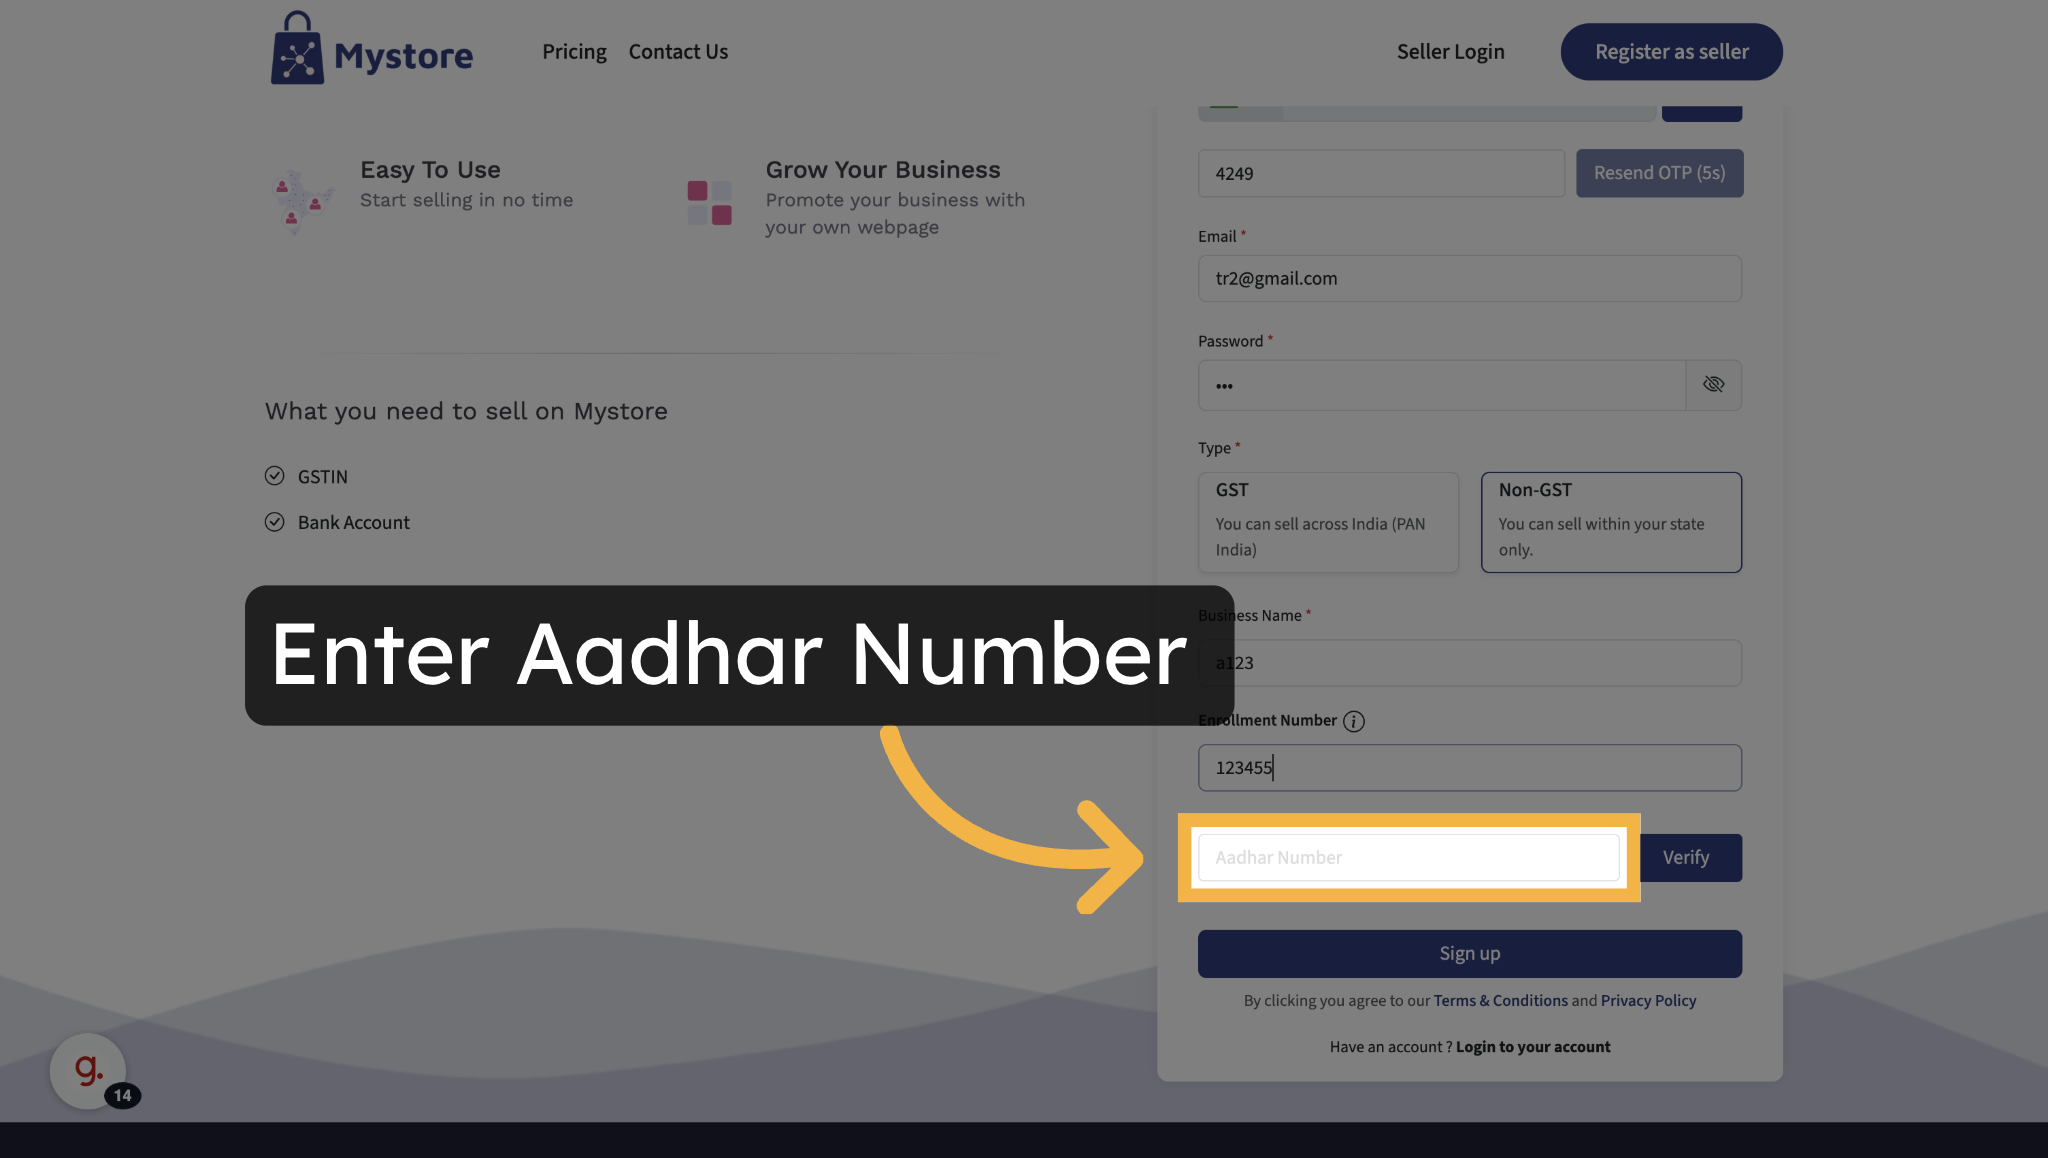
4. Verify your identity using your Aadhaar number:
- Enter your 12-digit Aadhaar number.
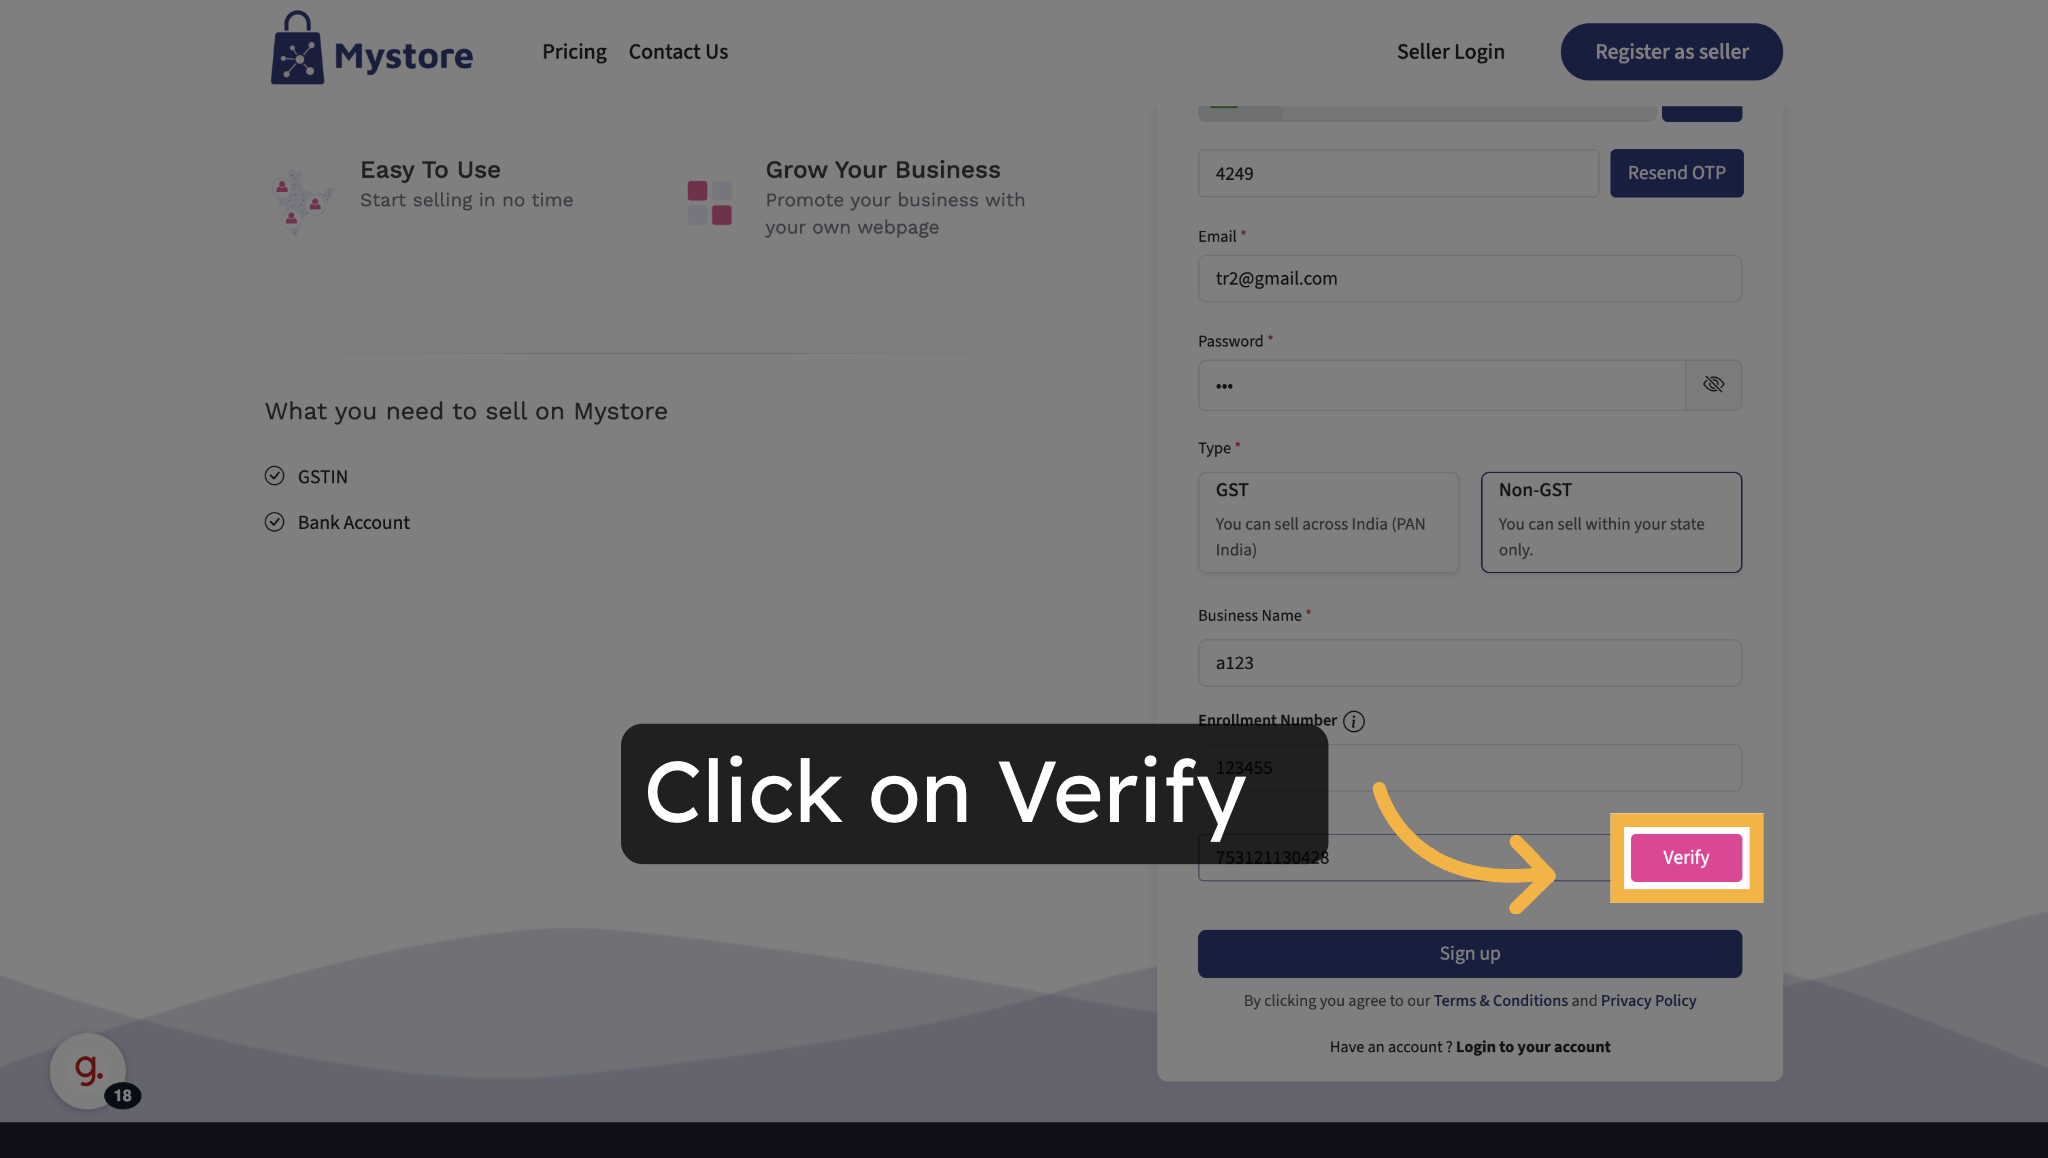
- Click on ‘Verify’ to receive an OTP on the phone number linked to your Aadhaar.
- Enter the OTP
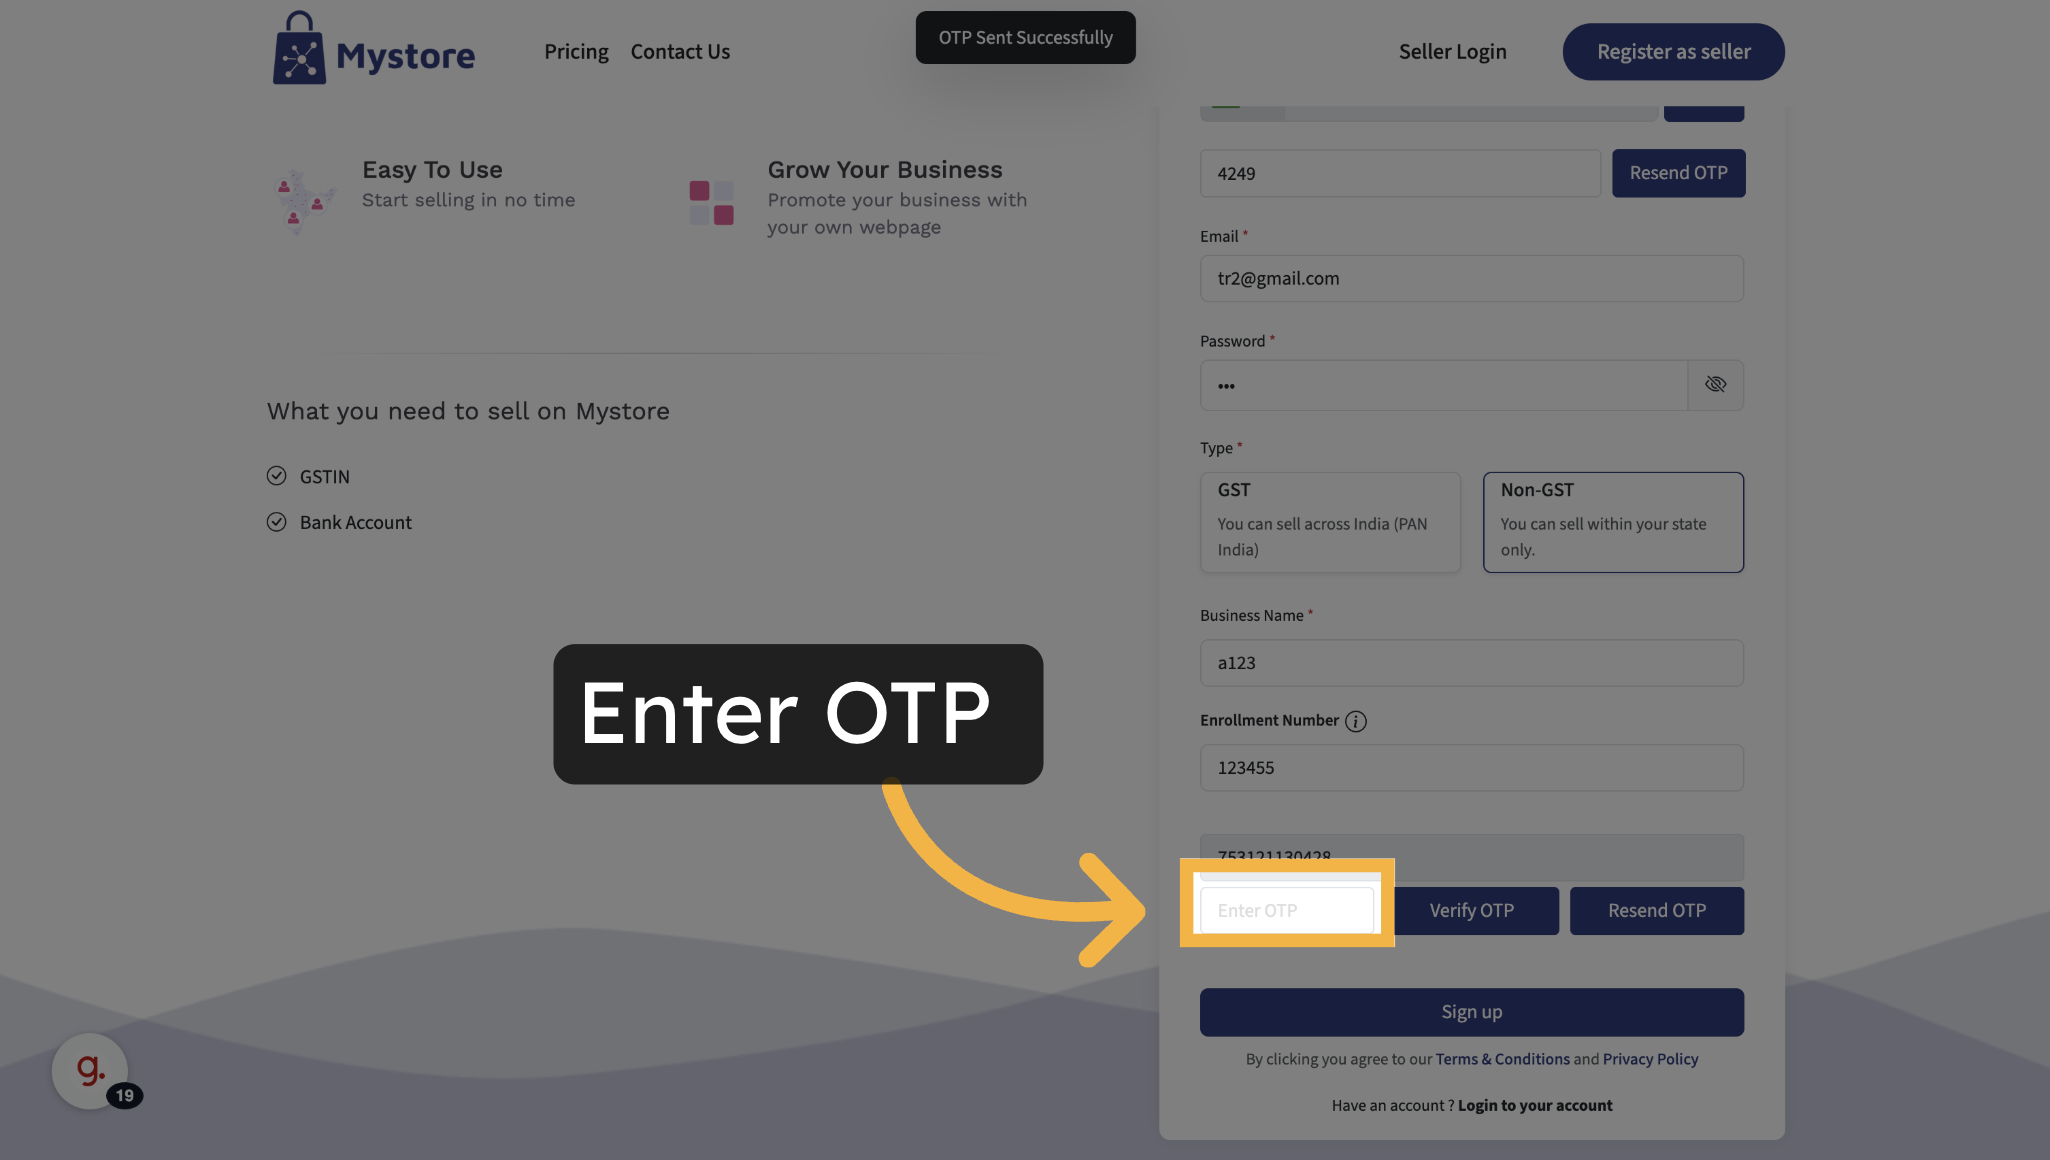
- Click on 'Verify OTP' button to complete Aadhaar verification.
.png)
Once verified, click on the ‘Sign Up’ button.
.png)
Your seller profile will now be created for intra-state selling.
KYC
After registering as a seller, you’ll be redirected to the Onboarding Page. This page helps you complete your seller profile with required business, address, bank, and store details.
The onboarding page is divided into two sections:
- Left Panel: Frequently Asked Questions (FAQs) – for quick answers to common seller issues.
- Right Panel: A step-by-step form to enter or verify your information.
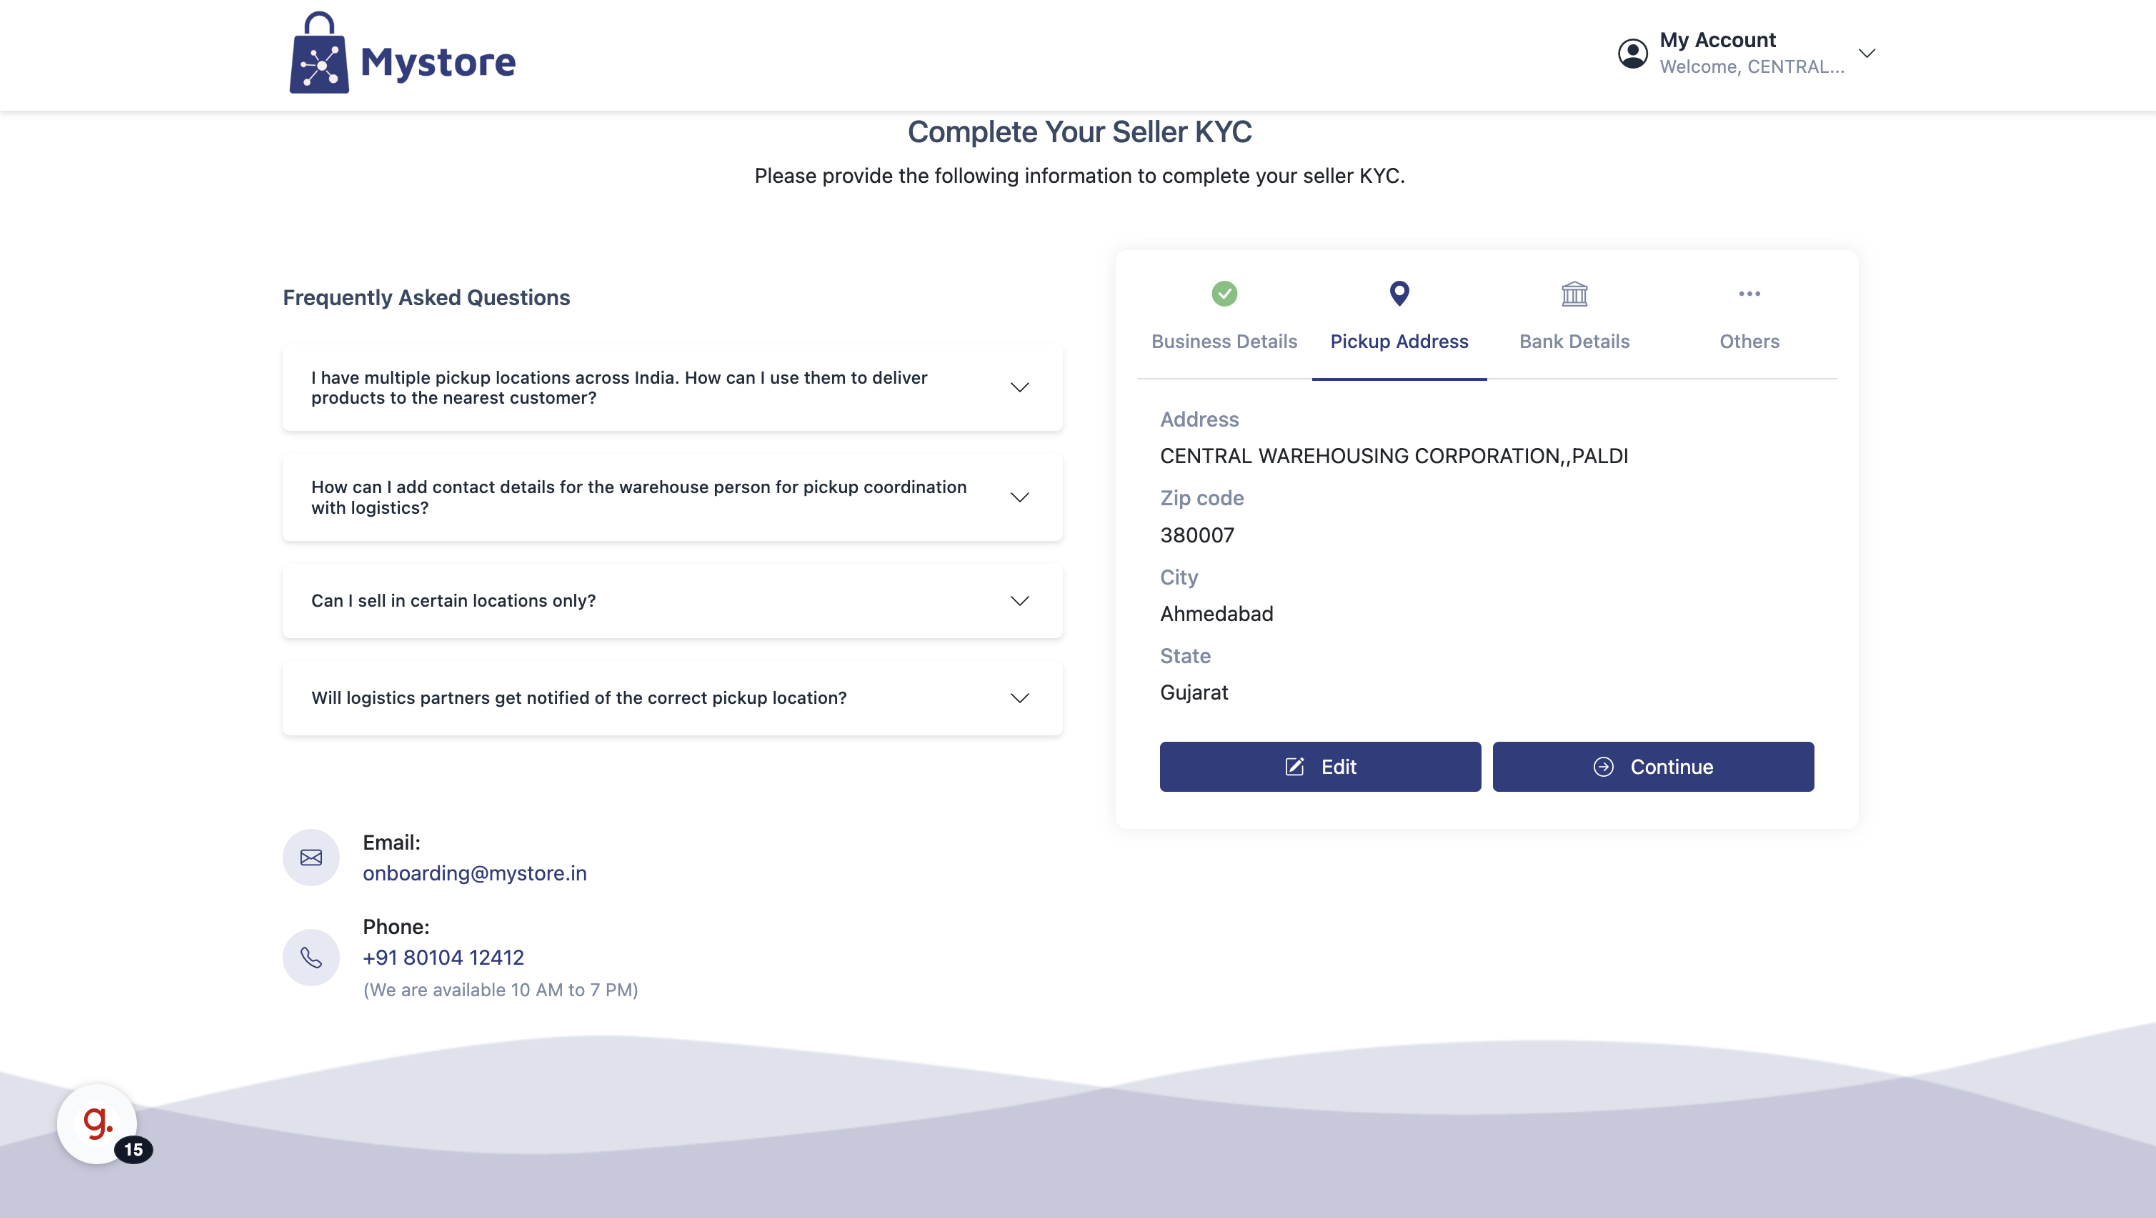
Follow the instructions below to complete each section.
Business Details
The business details shown here depend on whether you registered with a GSTIN or without one:
- If you entered a GSTIN during registration, your business details will be automatically fetched from the GST database. This includes:
- Business Name
- PAN Number
- Business Type
- Registered Business Address
- If you did not enter a GSTIN, the form will show limited details:
- Your Business Name and Enrollment Number will be pre-filled based on your registration input.
- You will need to manually enter your PAN number.
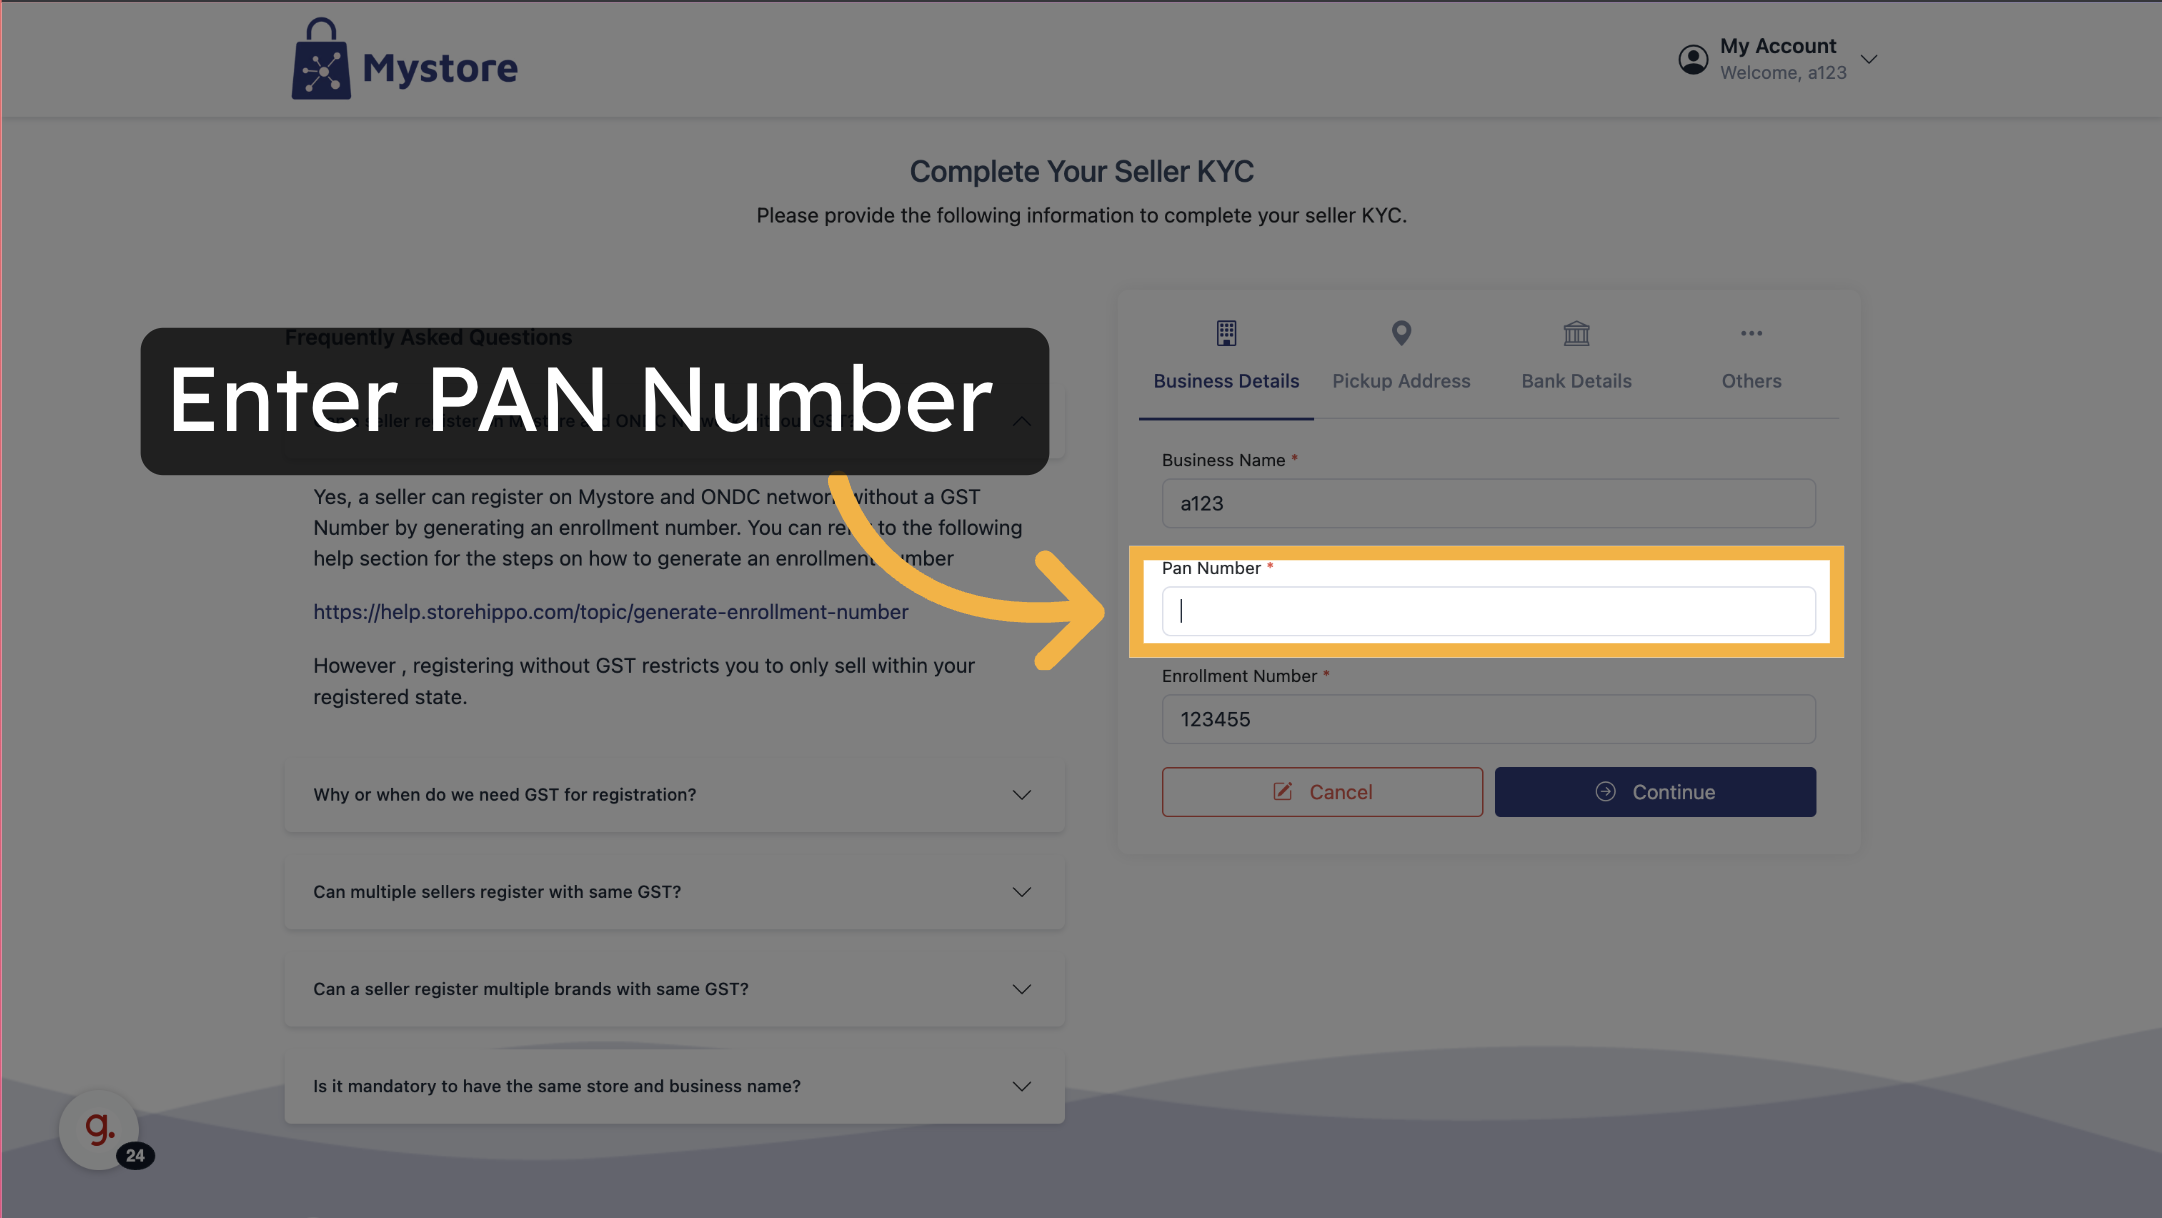
- Then click on 'Continue' button
.png)
If you wish to update your GSTIN, click the Edit button next to the GST field.
.png)
Once you've reviewed or filled in the necessary details:
- Click the Continue button to proceed to the next step.
.png)
Pickup Address
By default, your pickup address will be the same as your registered business address.
If you want to use a different pickup address:
1. Click on the Edit button next to the pickup address.
2. Click on ‘Show Map’ button.
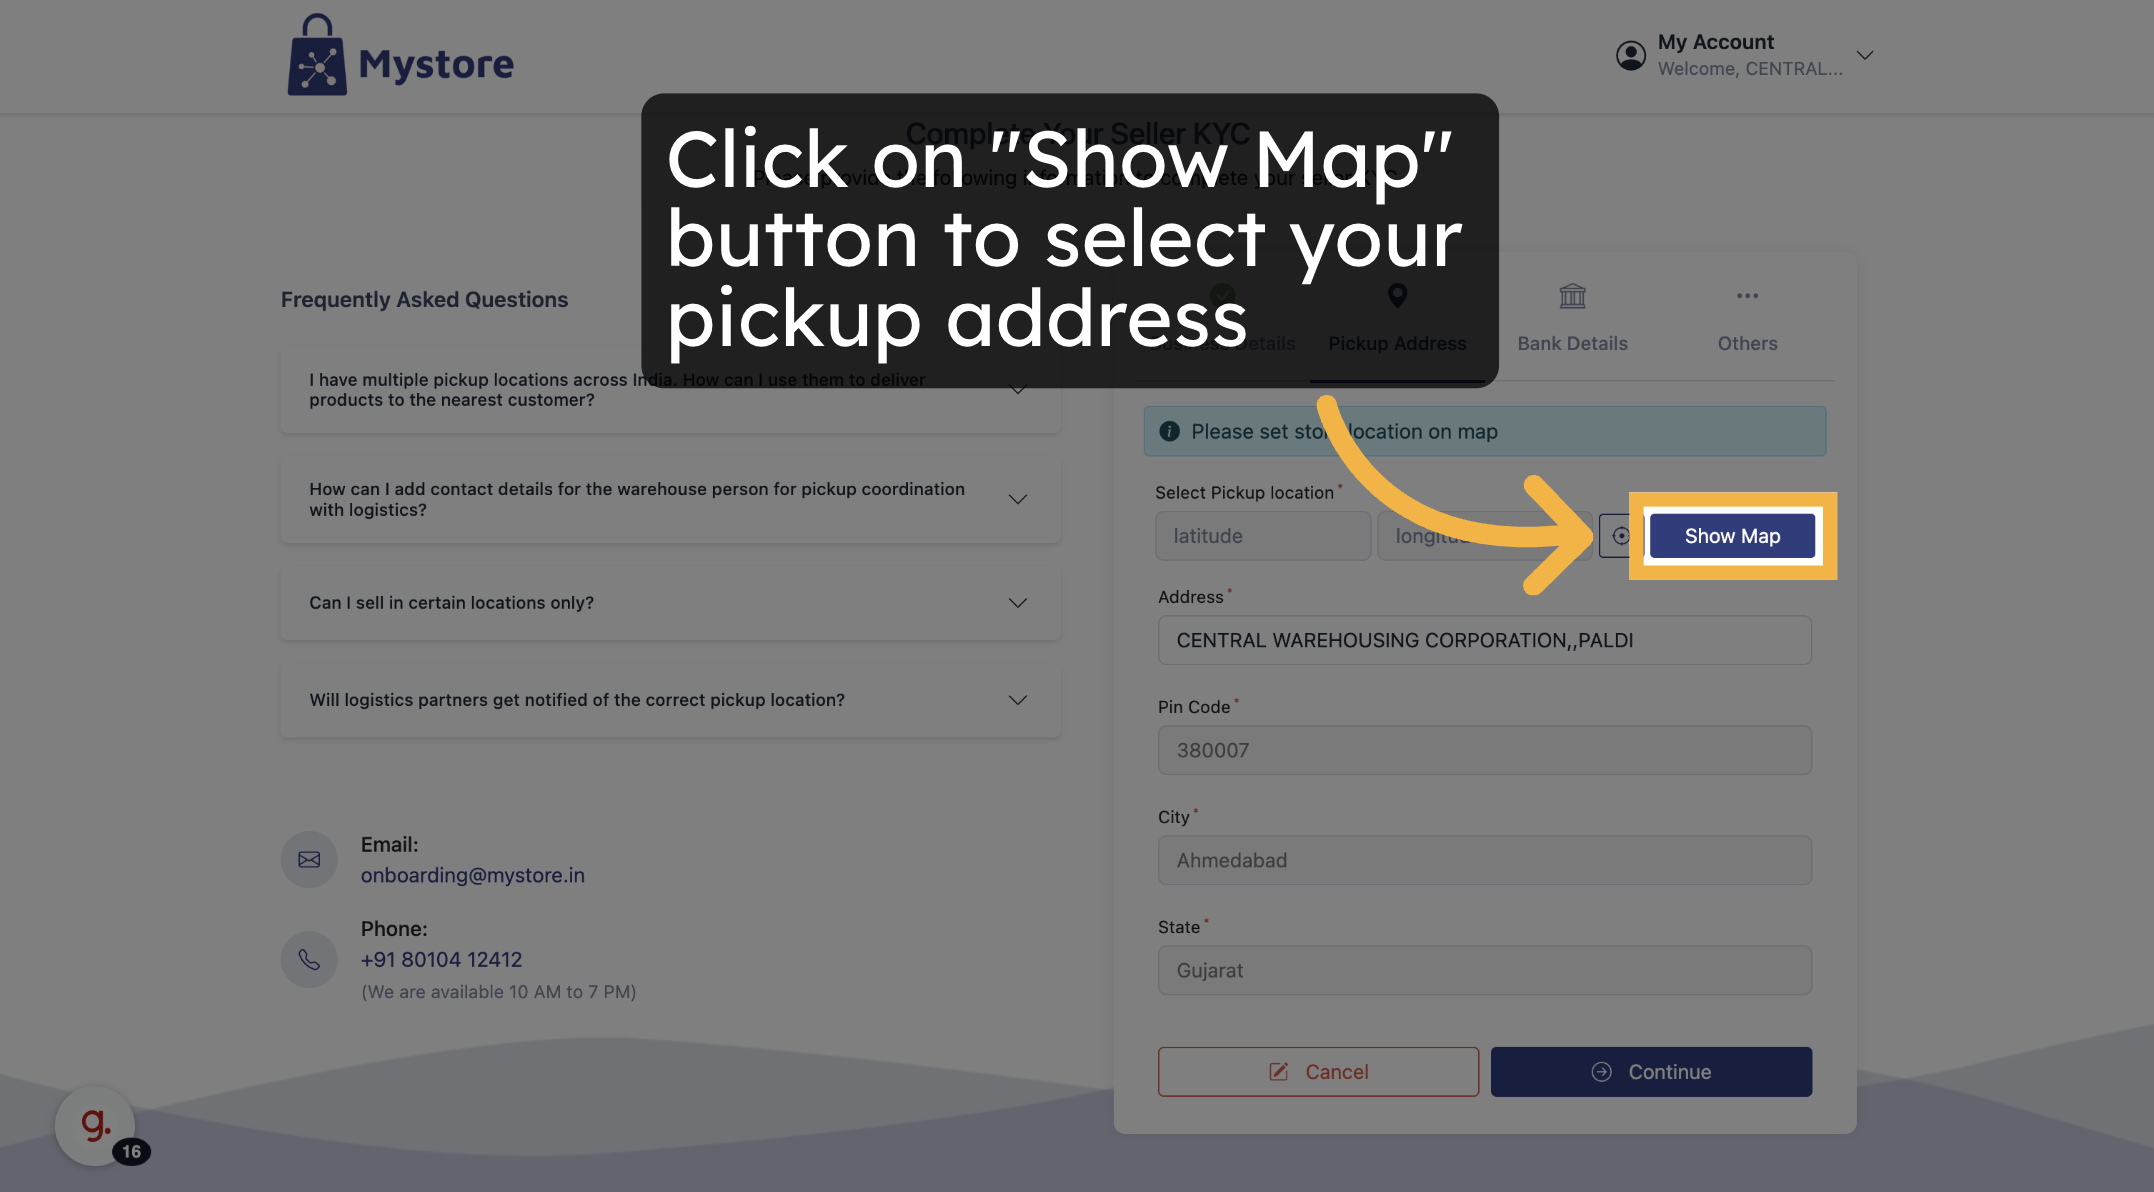
3. A map will open. Use the pin-drop feature to mark your correct pickup location.
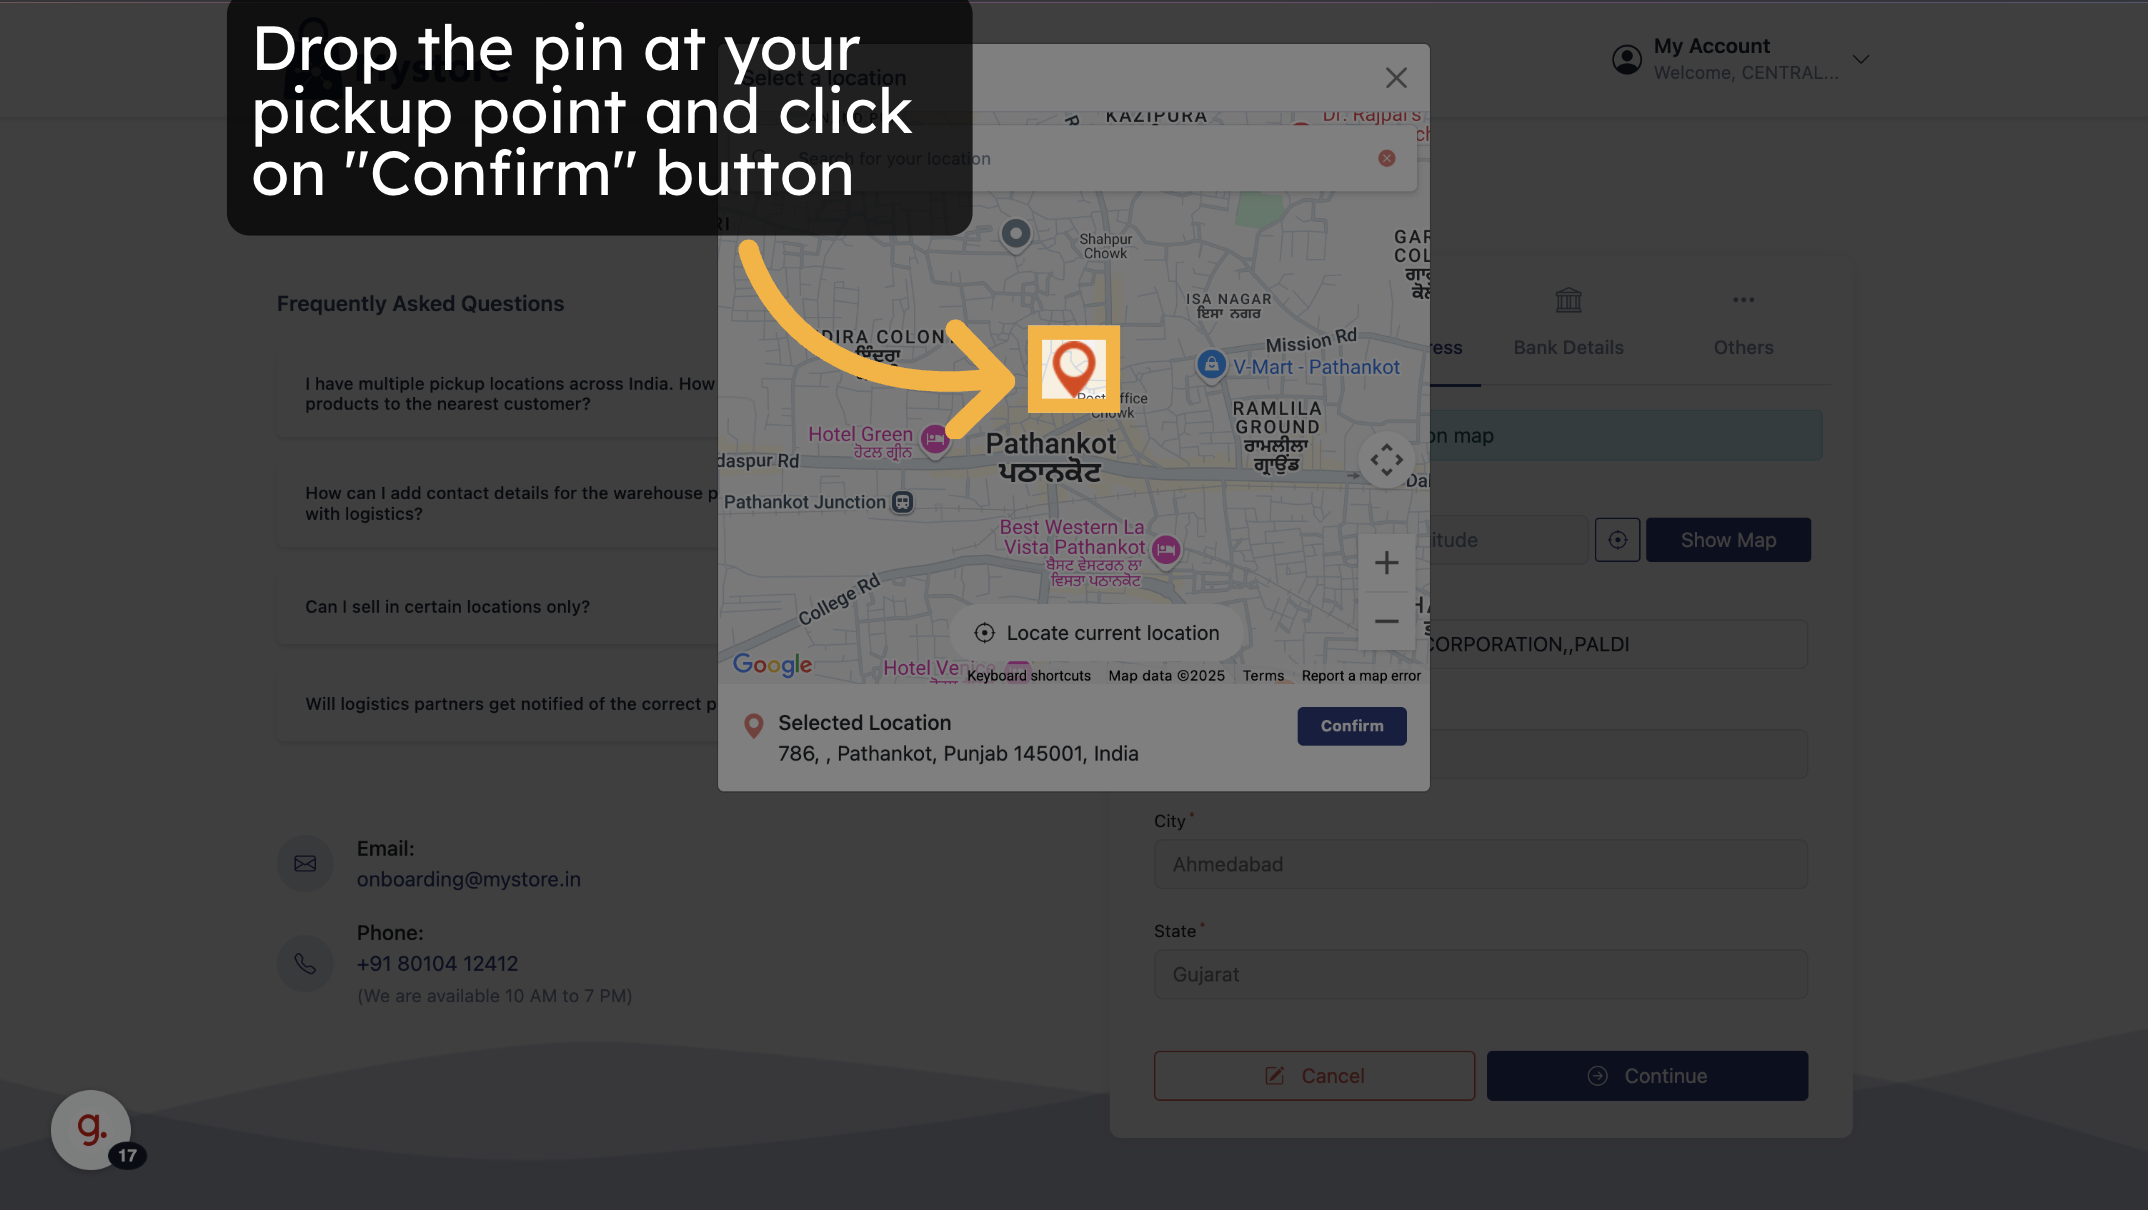
4. Click the Confirm button once you've placed the pin.
When you're done:
- Click Continue.
.png)
Bank Details
Before entering your bank information, note the following:
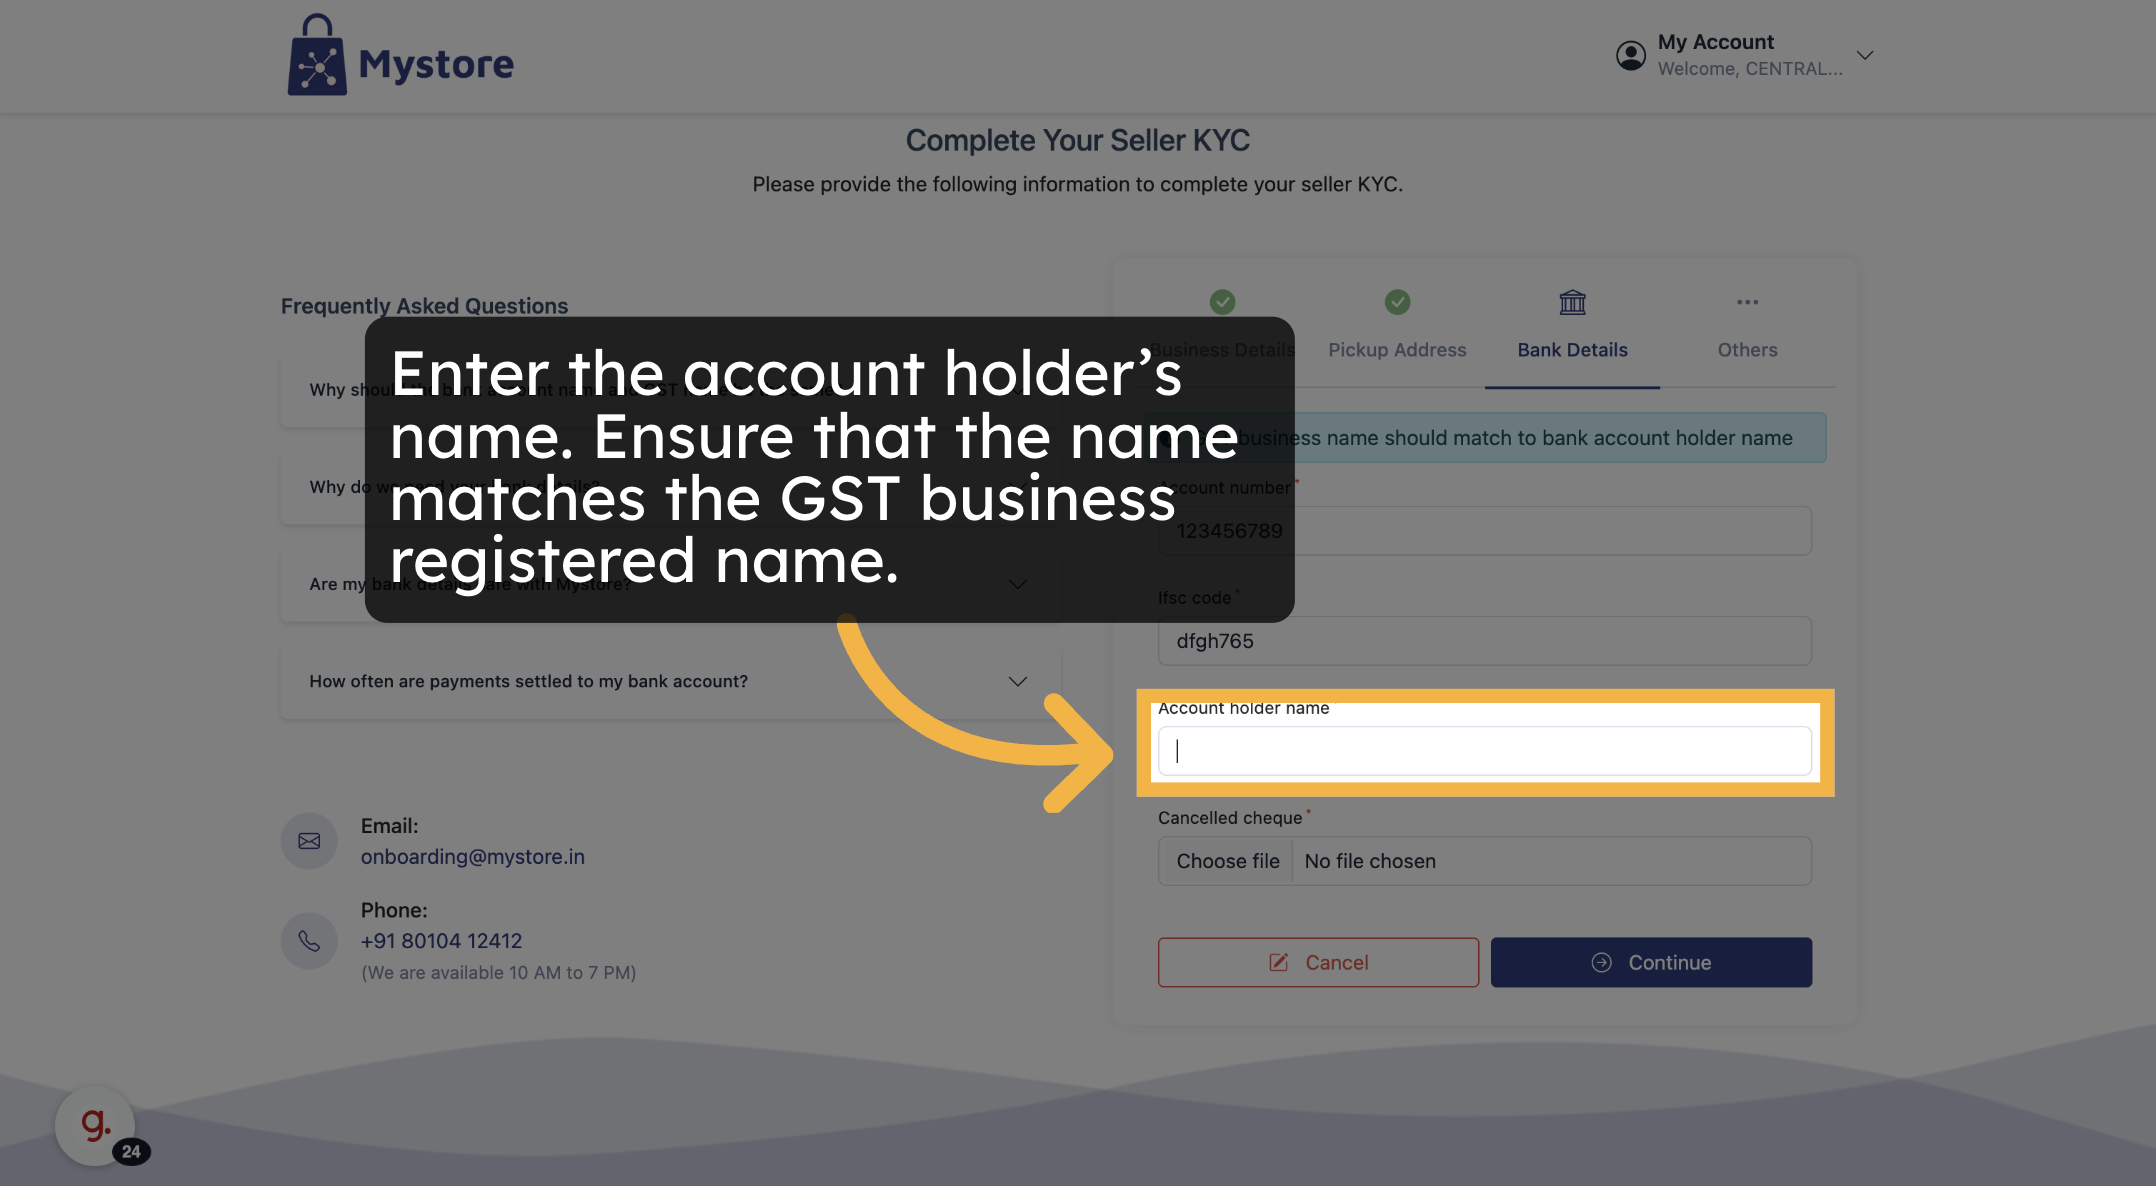
⚠️ Bank account holder name must match the business name registered under your GST.
Now fill in the following details:
- Account Number
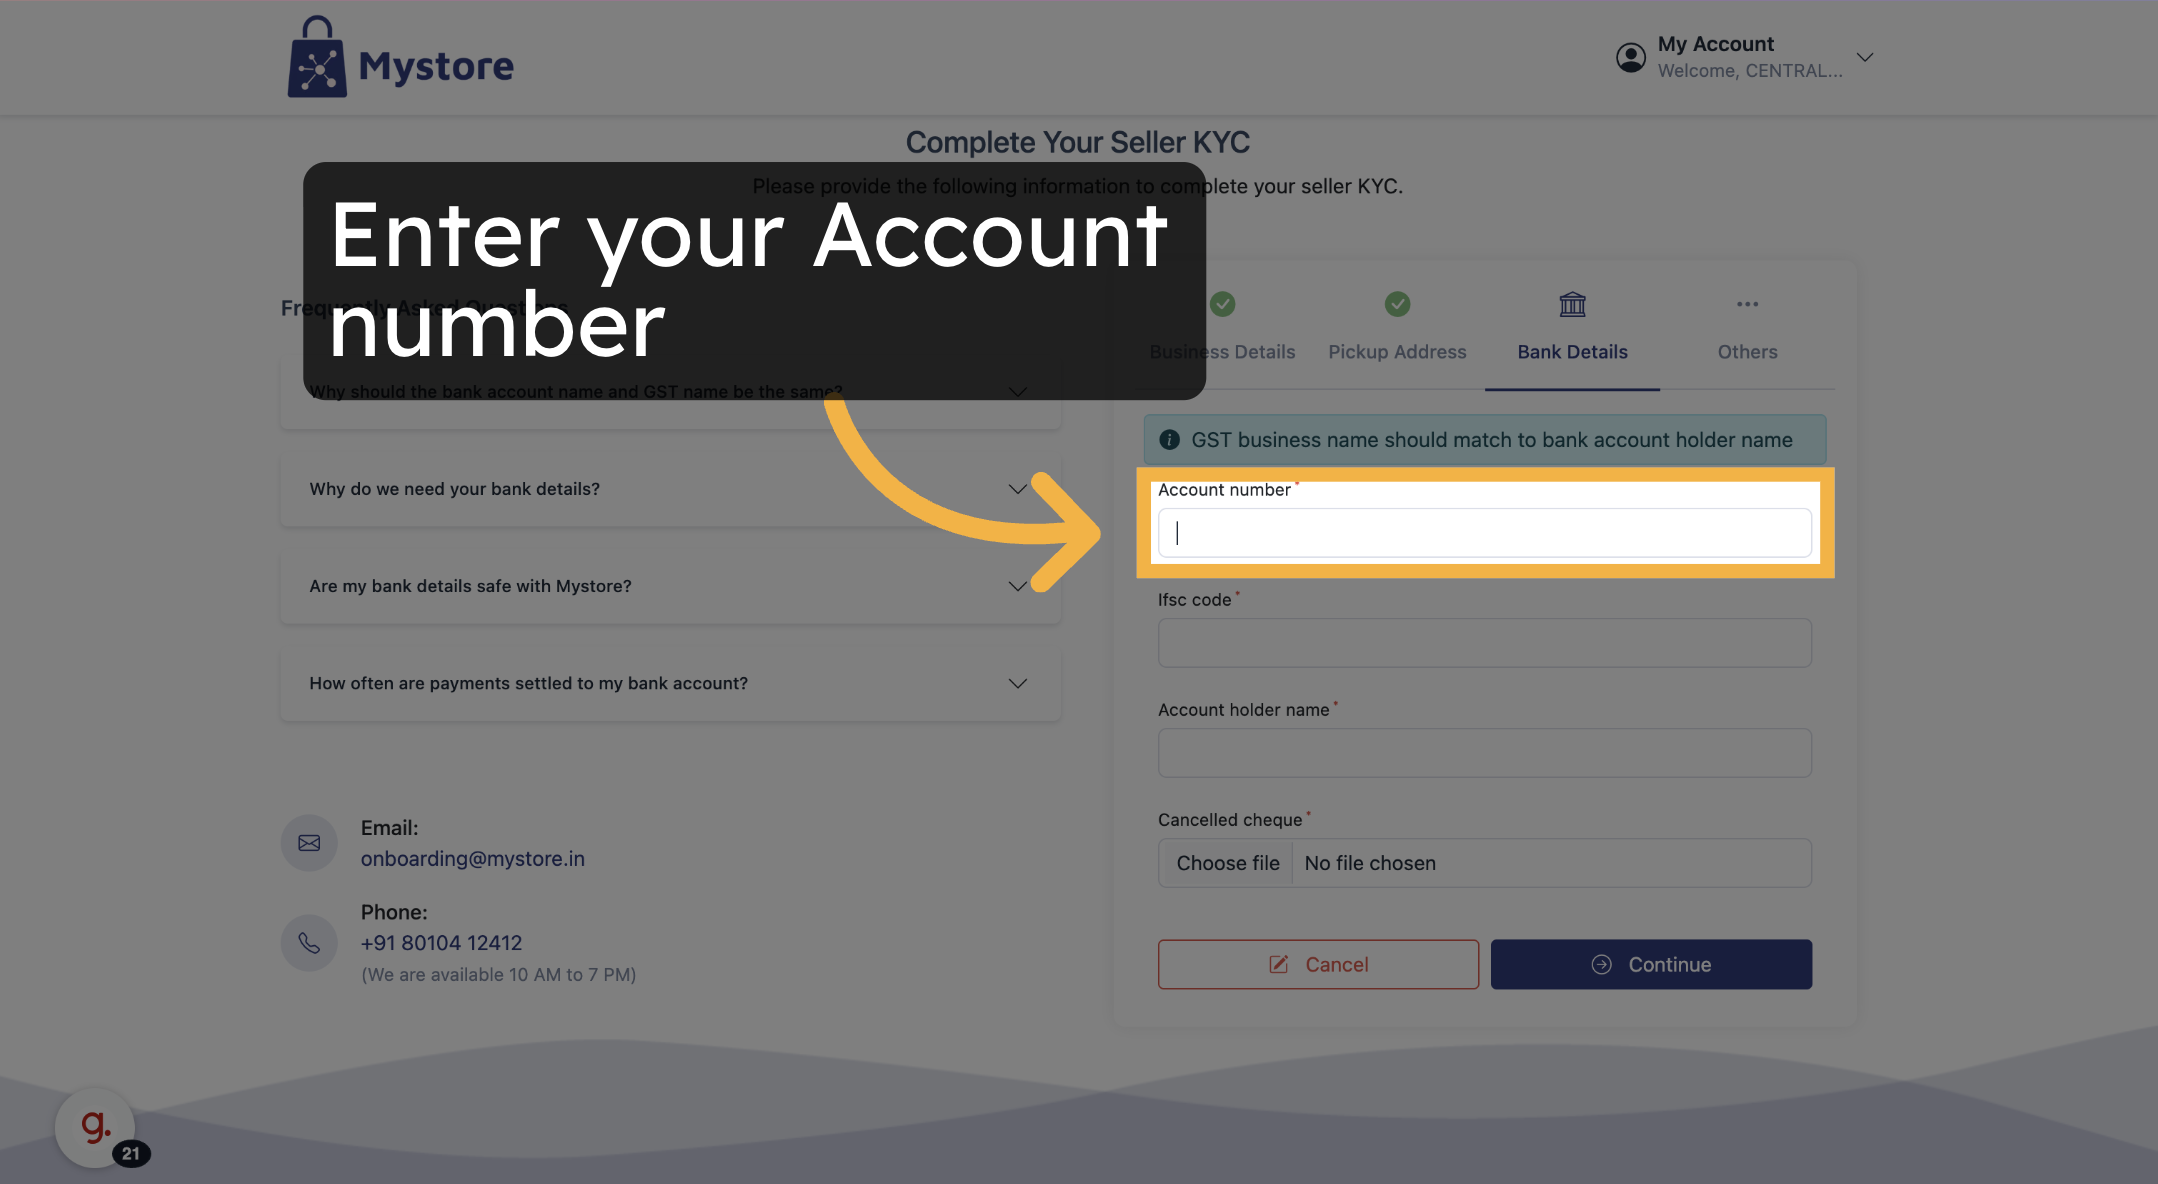
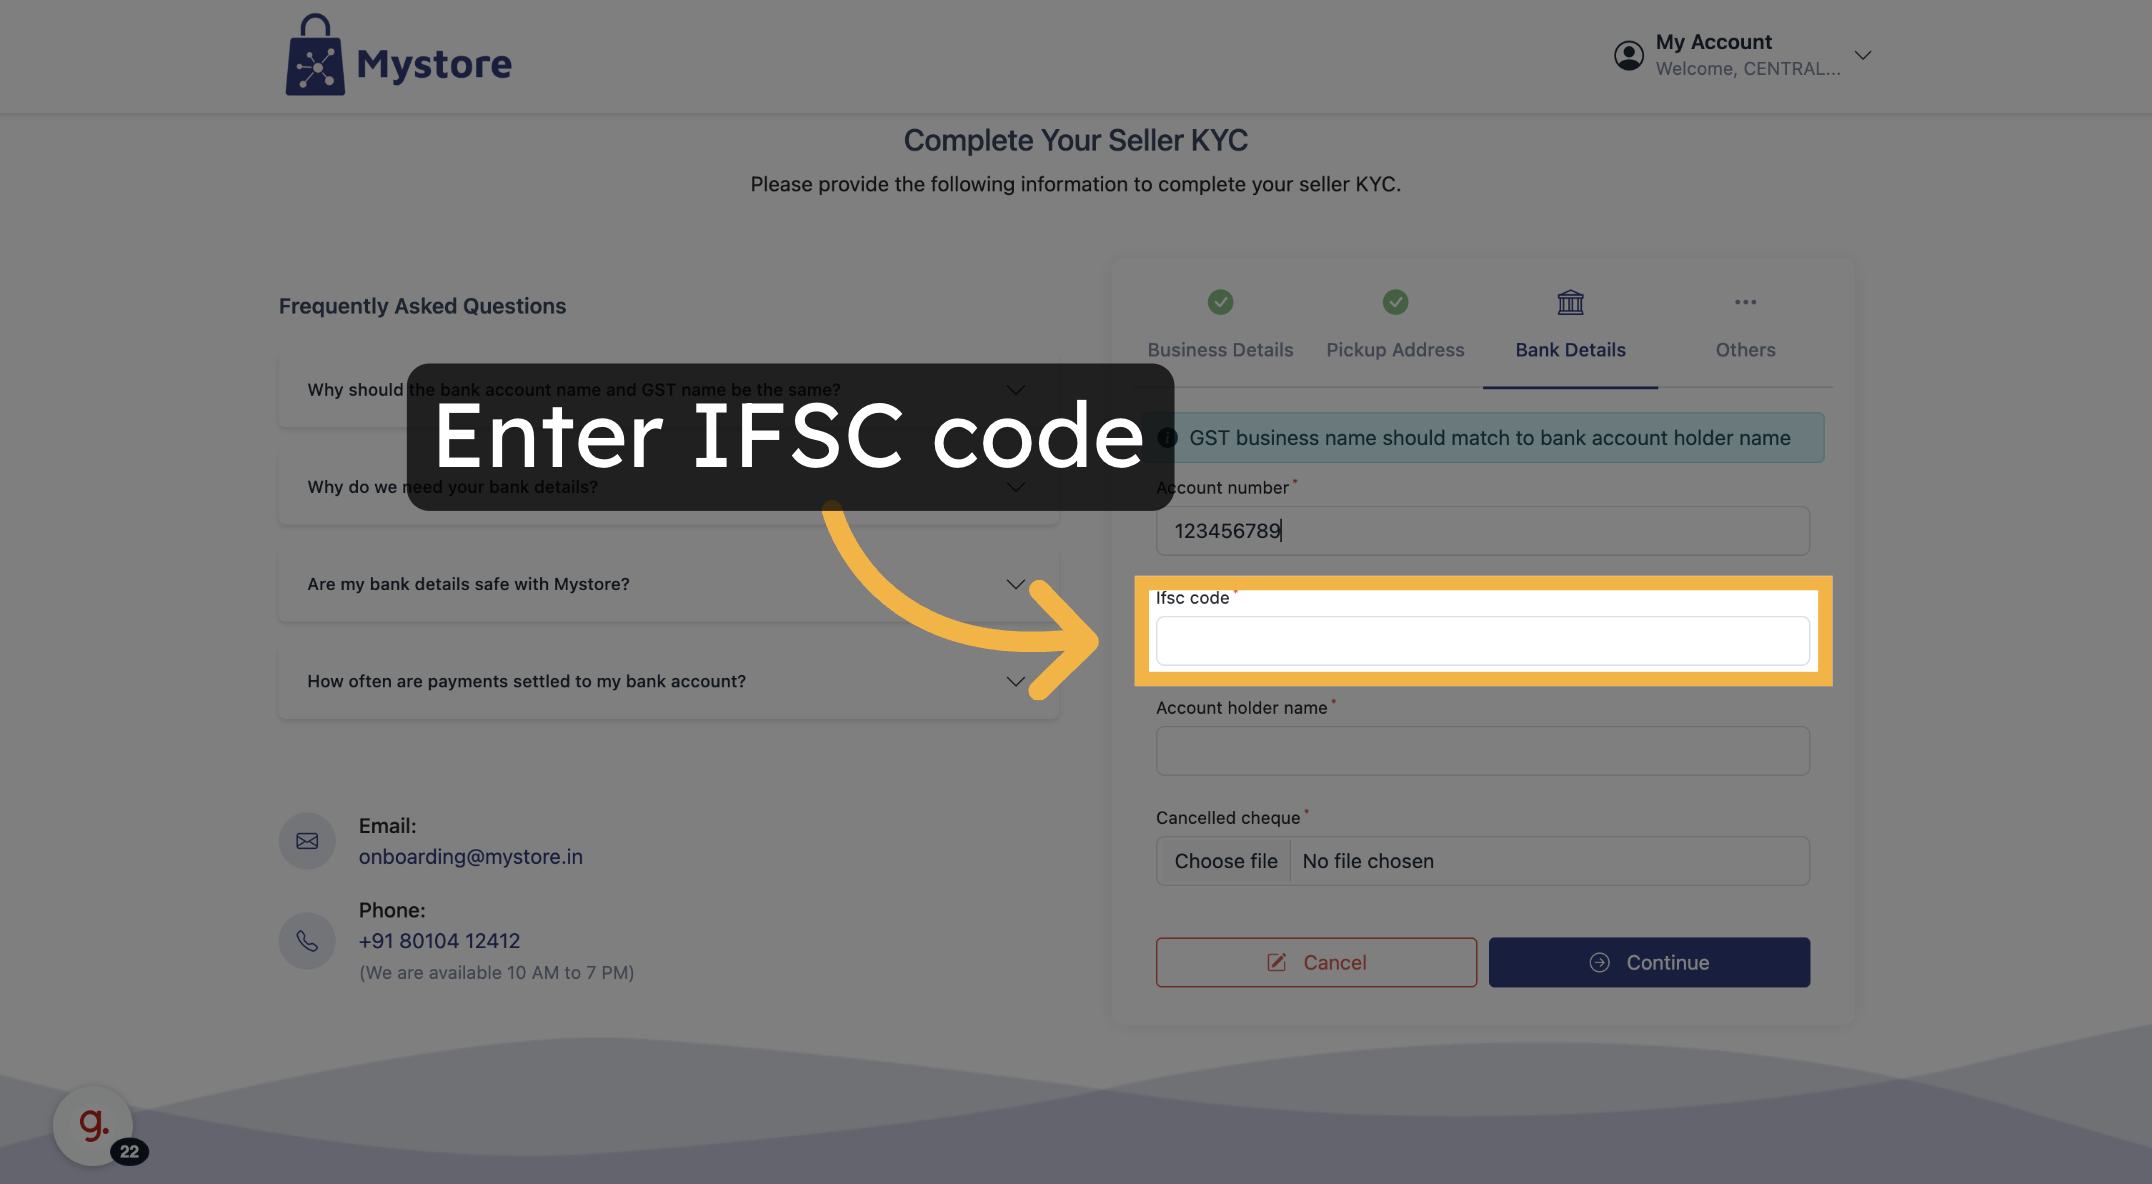
- IFSC Code
- Account Holder Name
- Upload a Cancelled Cheque
- Use the upload button to select and attach the file.
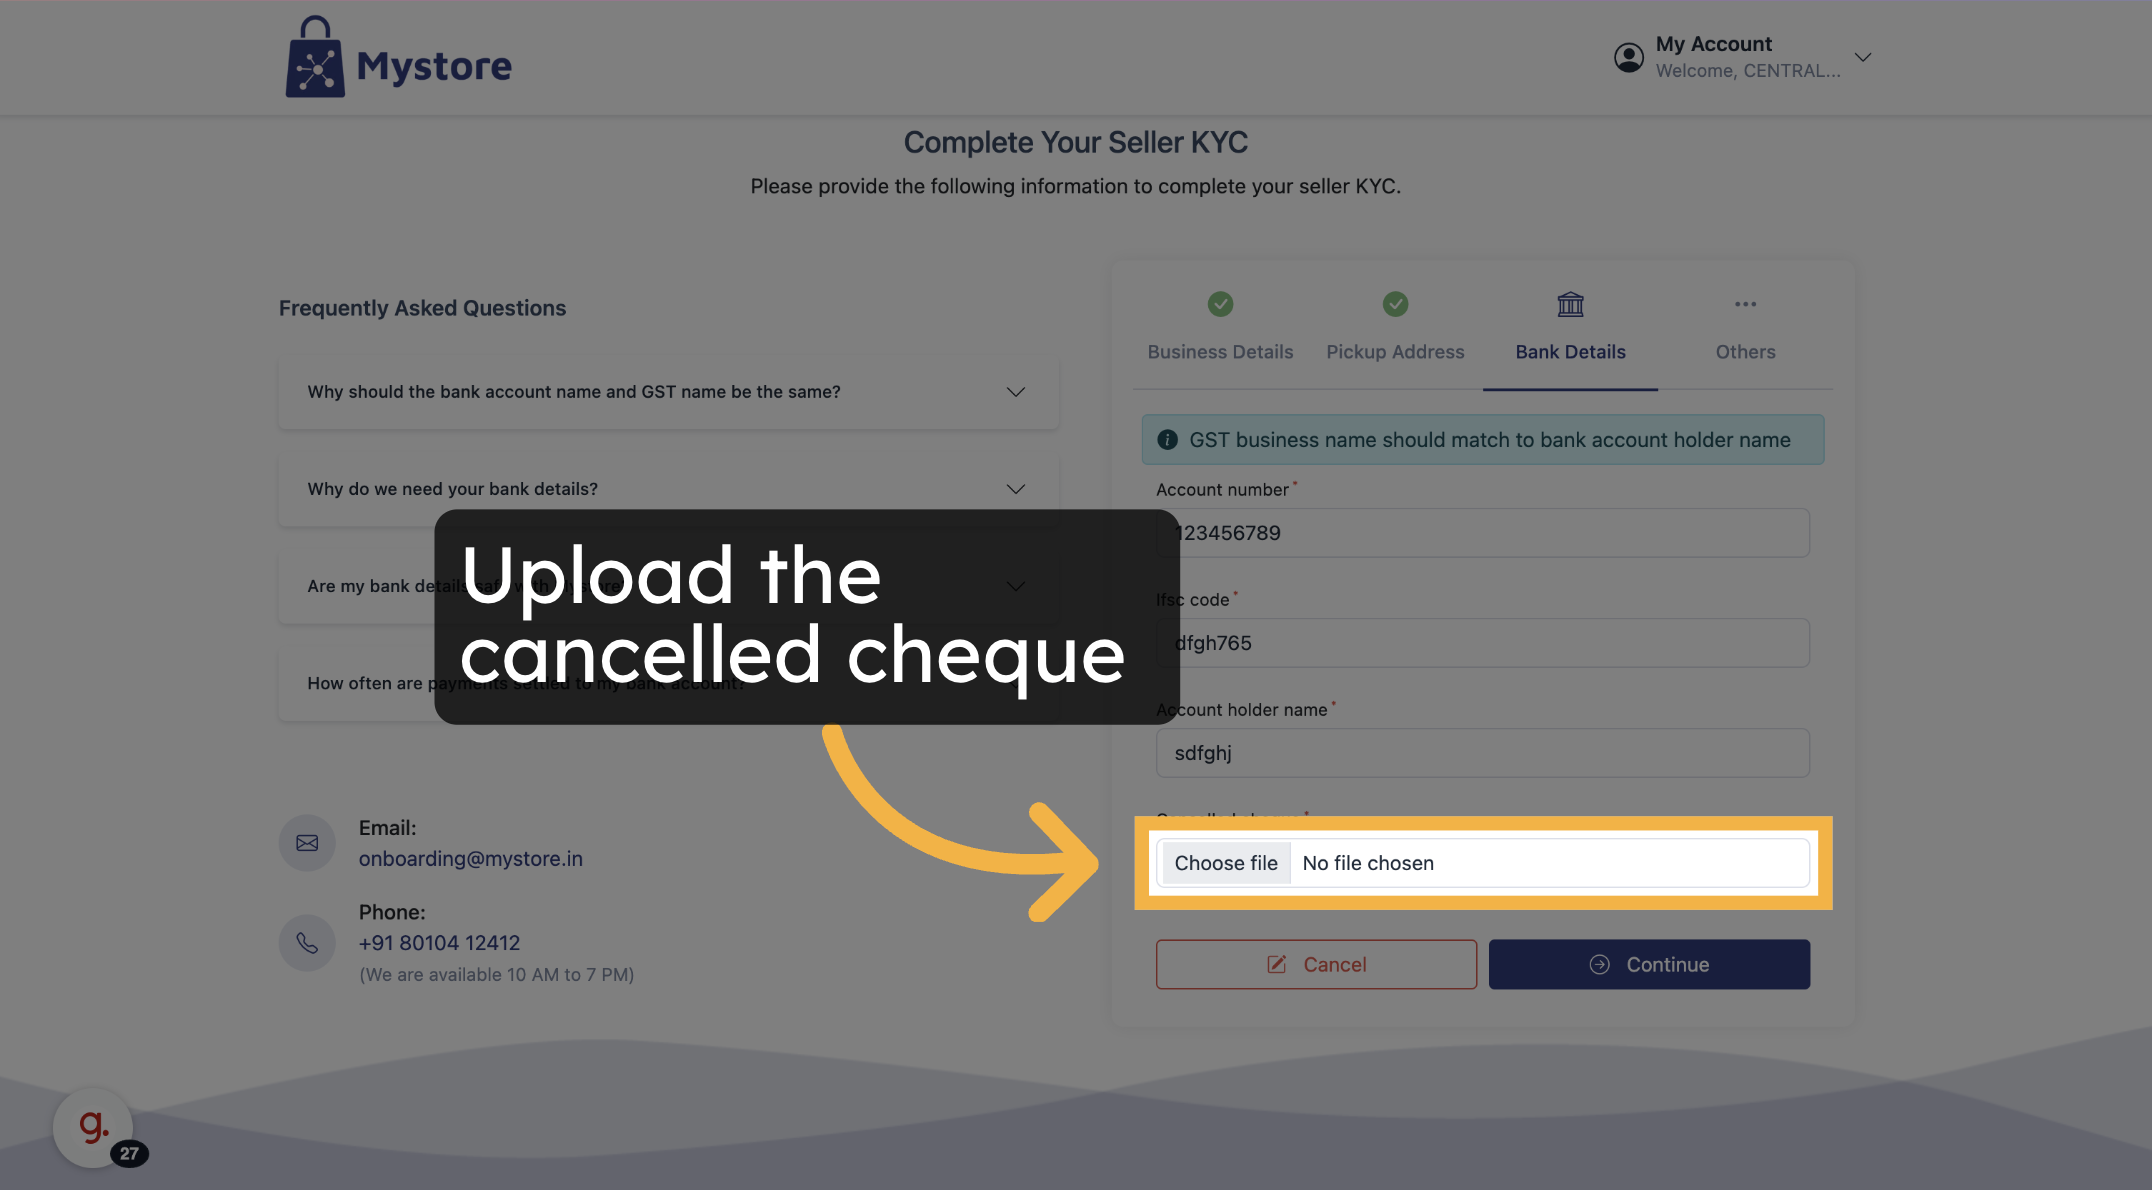
After entering all details:
- Click Continue.
.png)
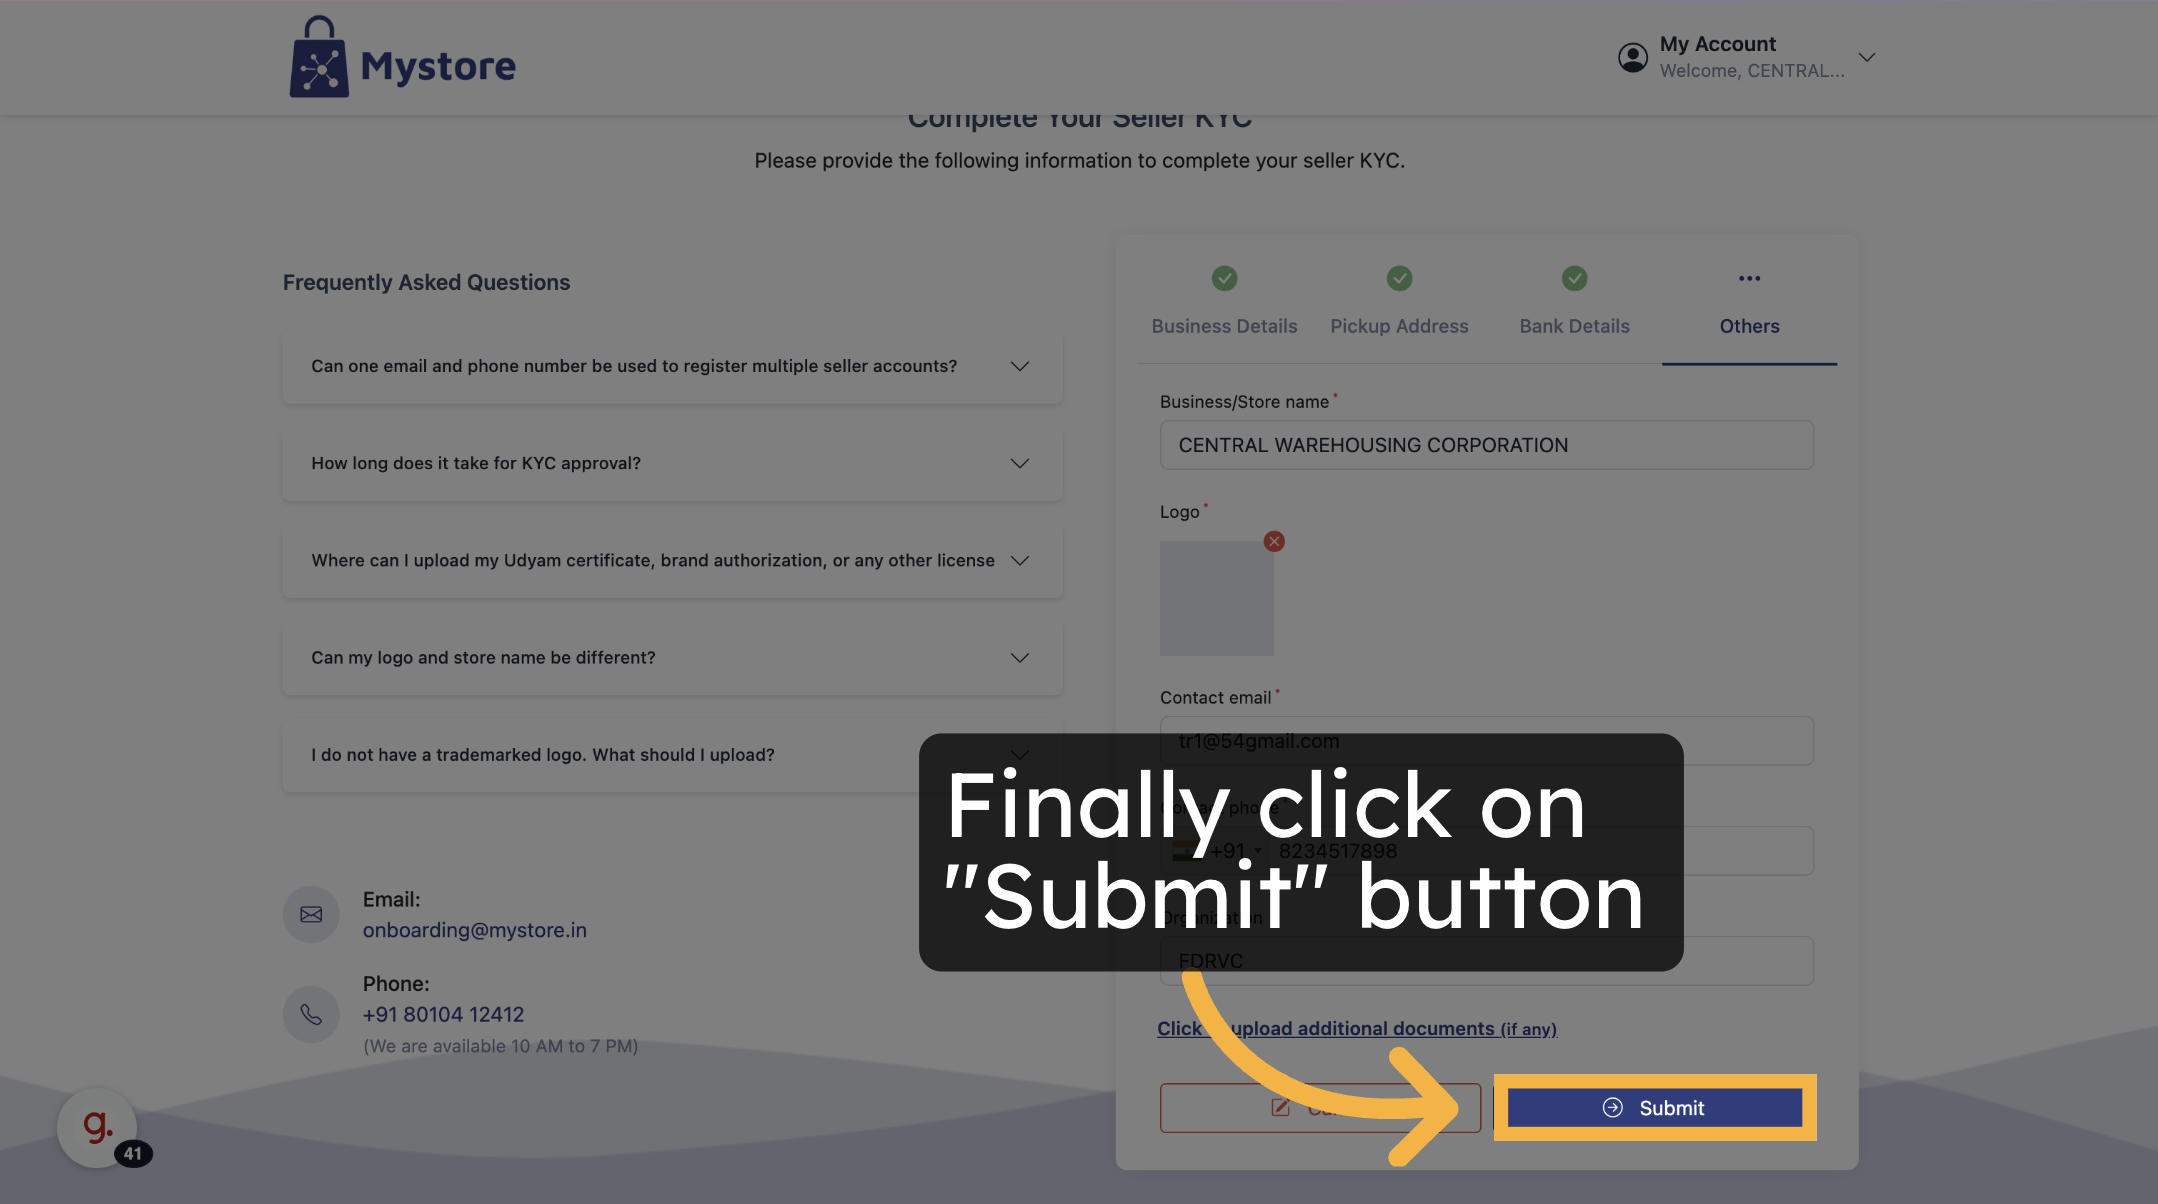
Store Information
Here, you can personalize your online store:
1. Edit Store Name (optional)
2. Upload a Store Logo
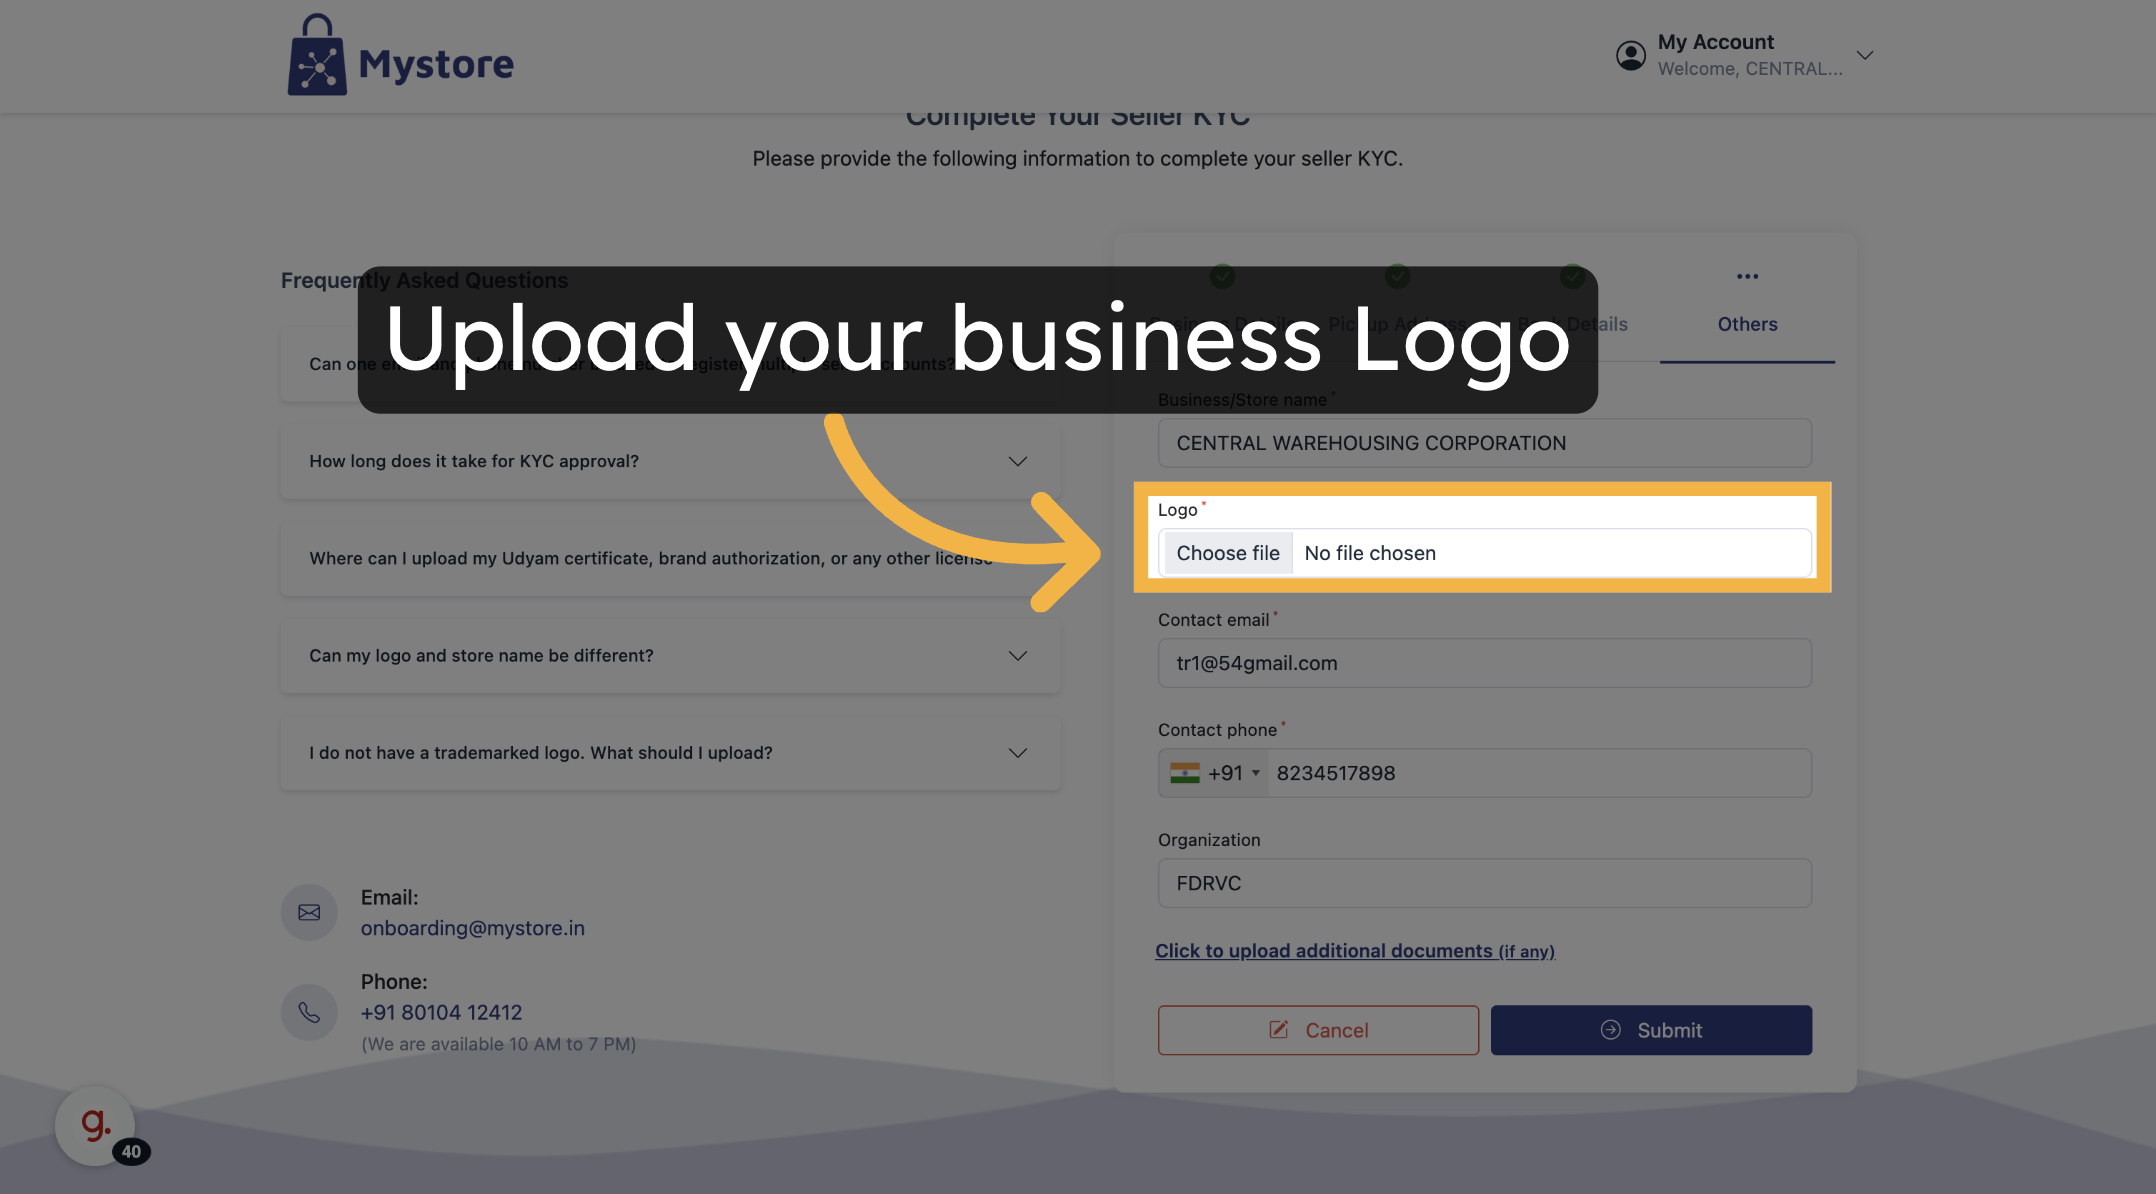
3. Edit Contact Information
- Update your contact email or phone number, if needed.
4. Select Organization (if applicable)
- Choose from the listed organizations if you belong to any.
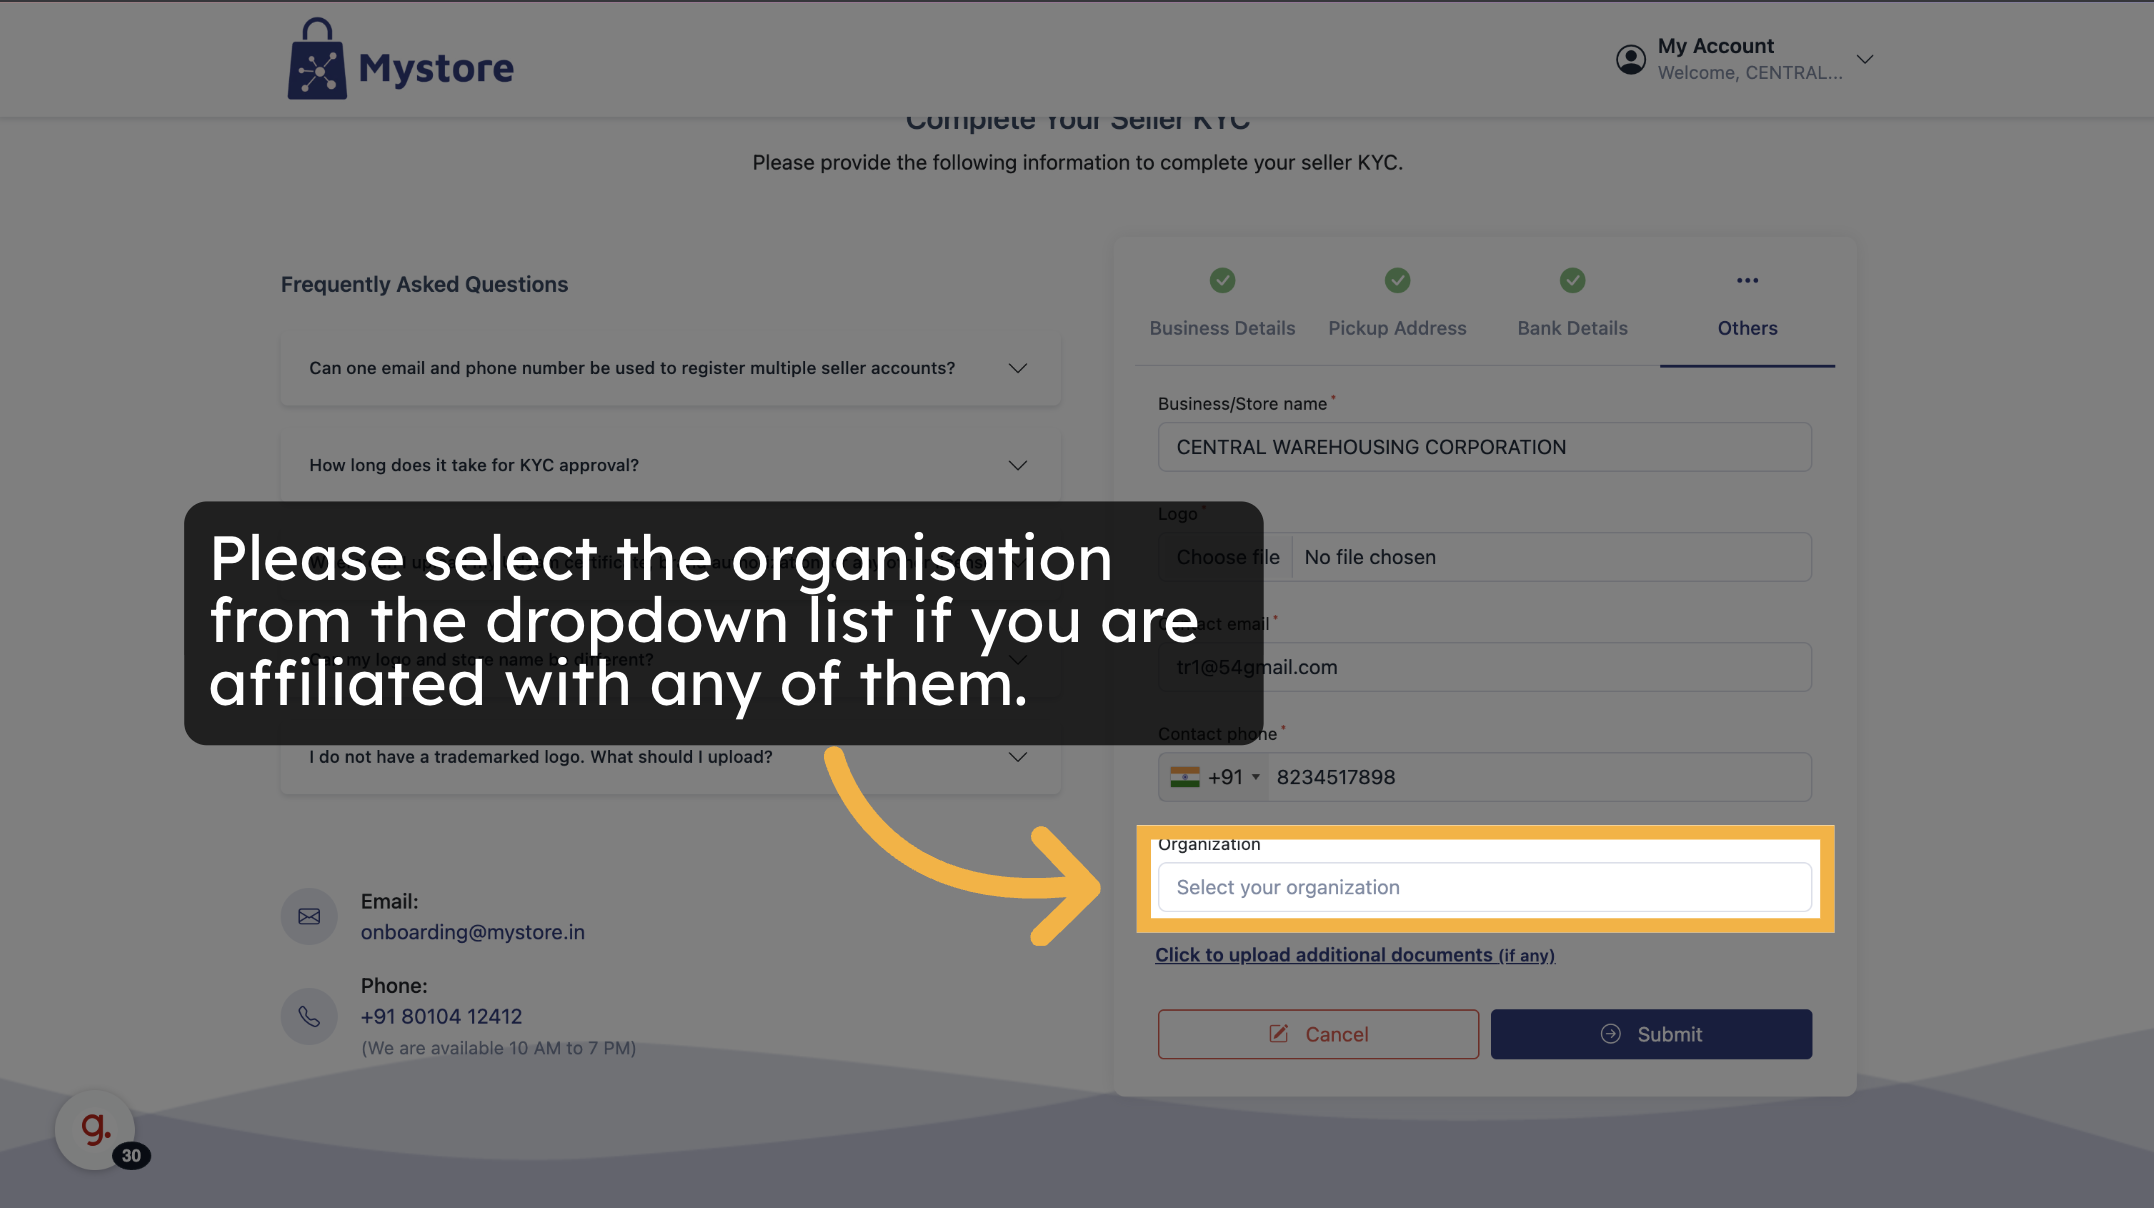
Upload Supporting Documents (If Required)
If you need to upload any documents:
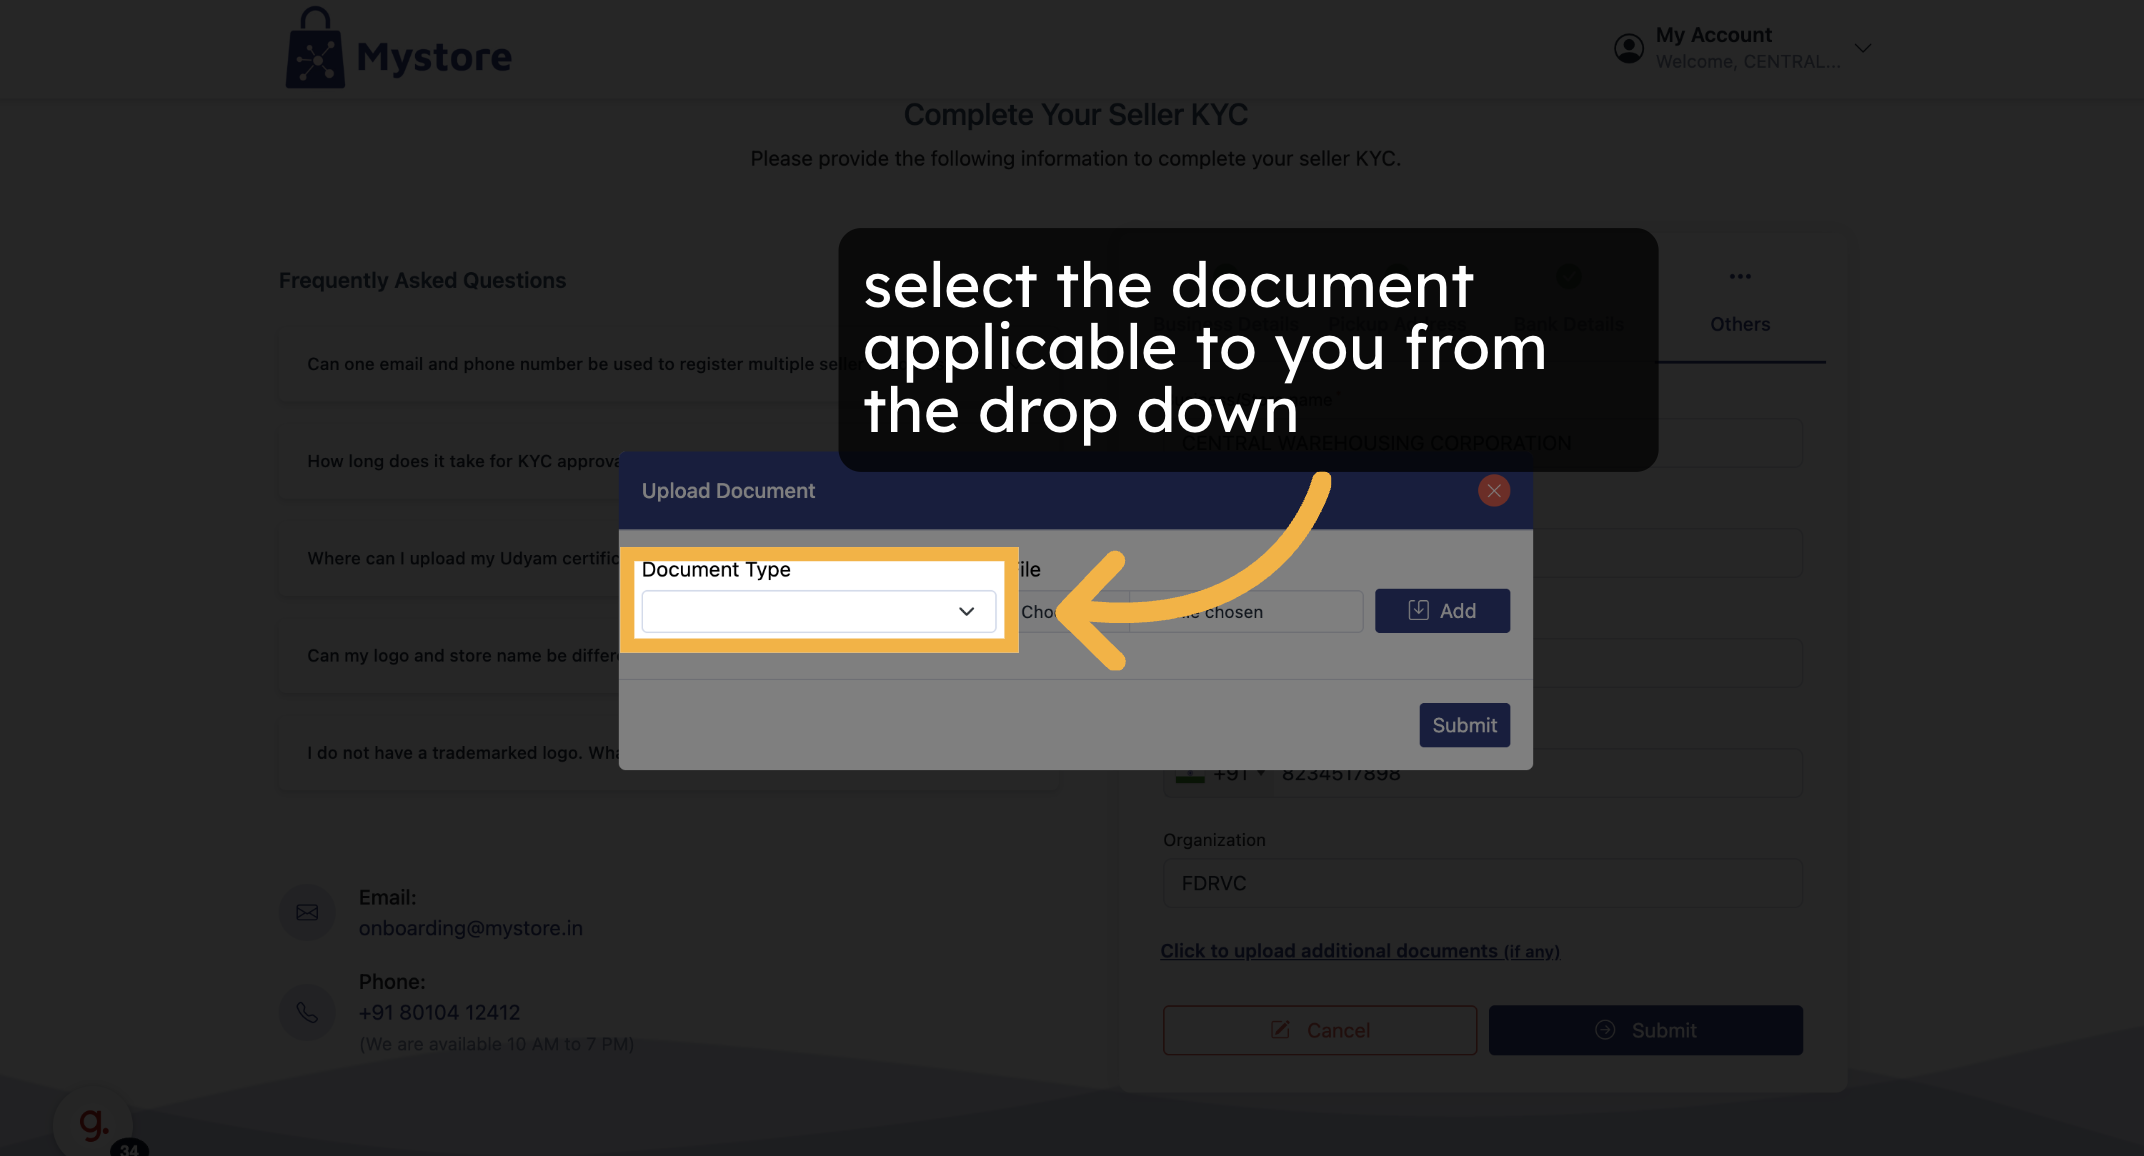
1. Click on ‘Upload Documents’.
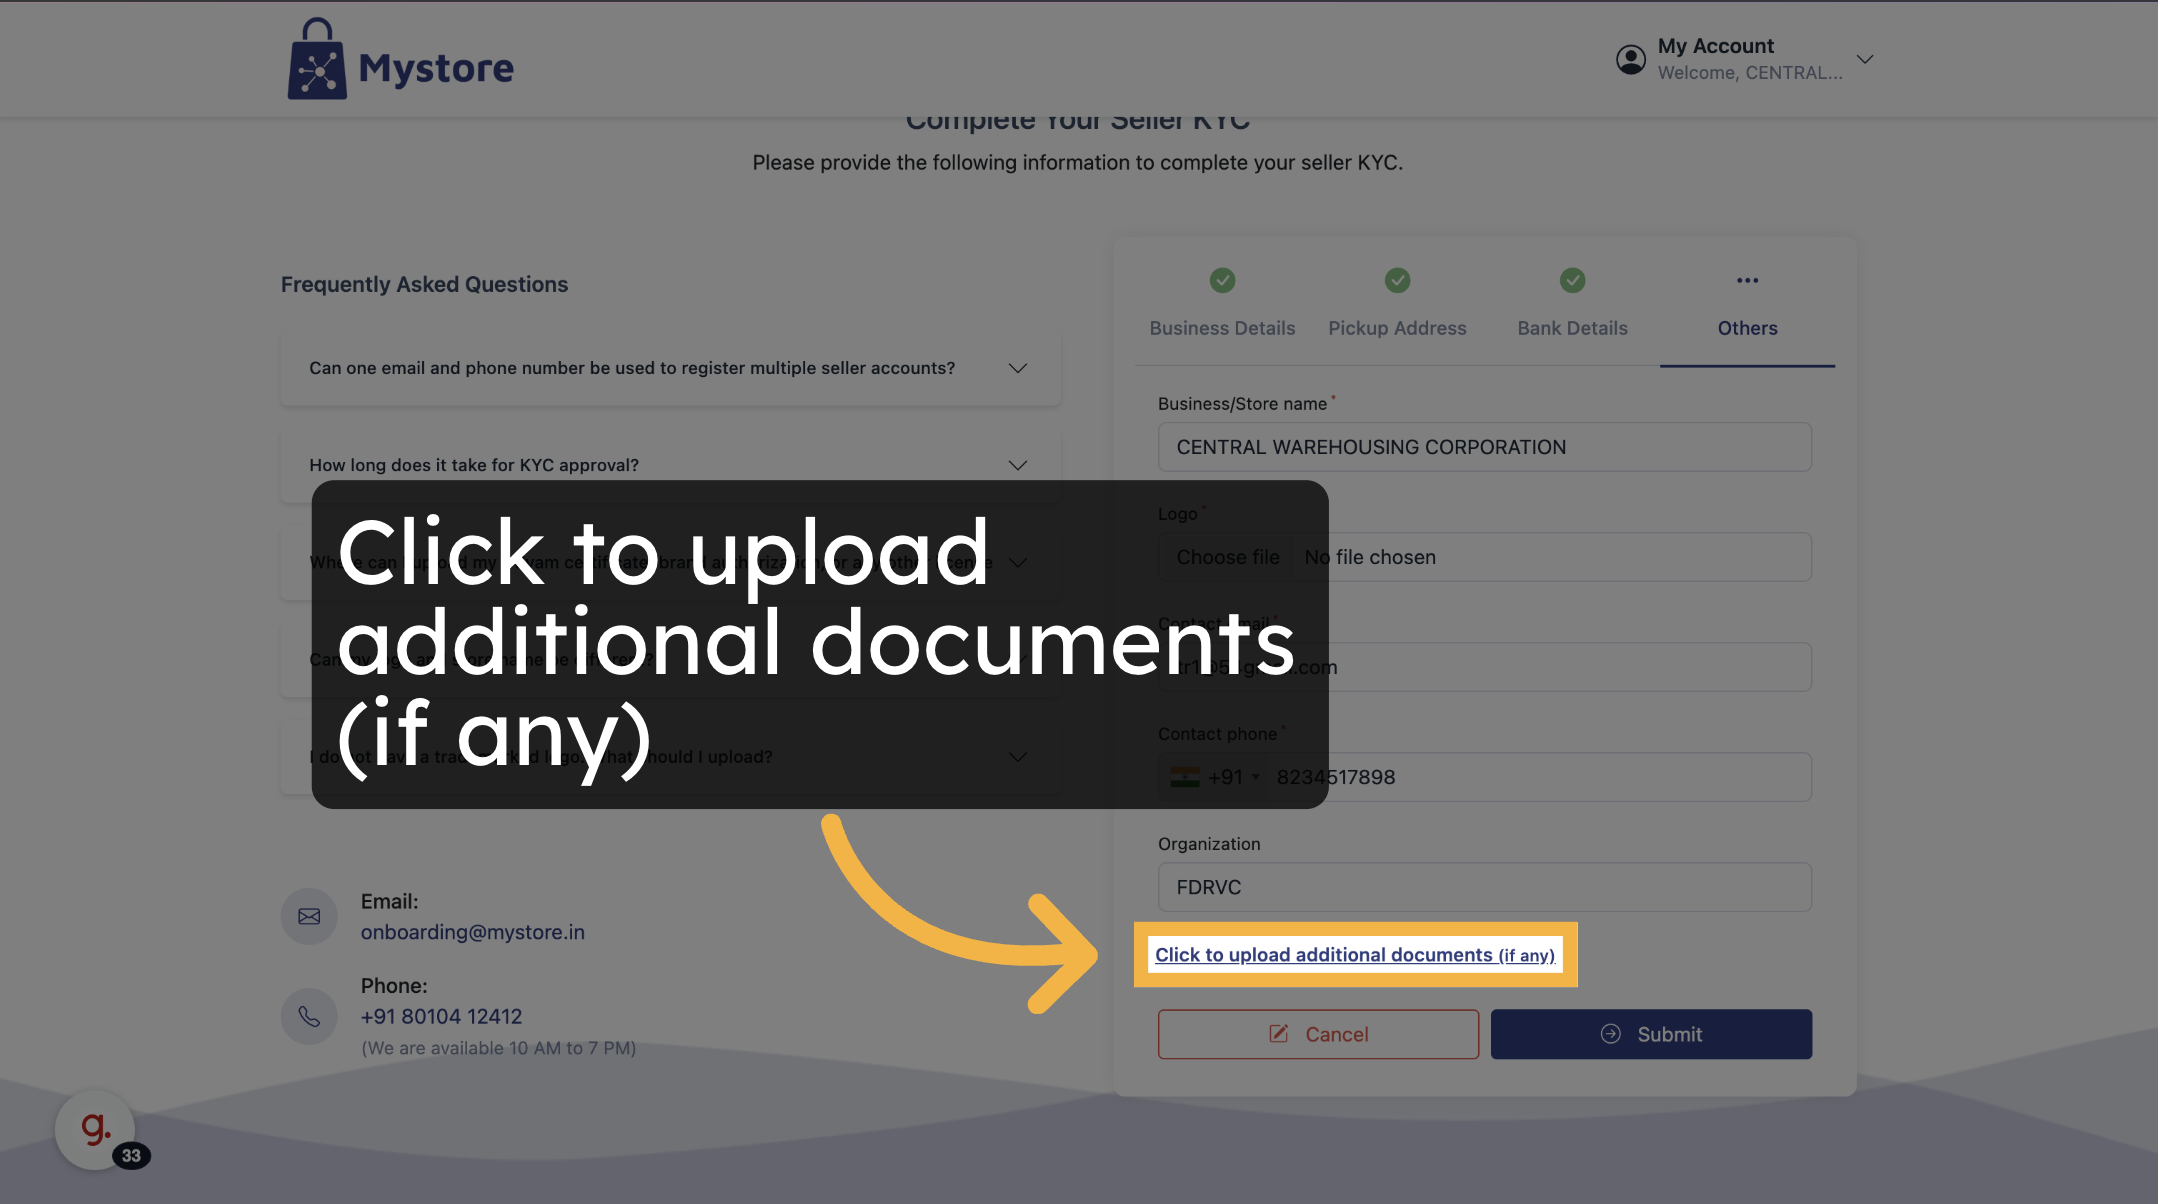
2. Select the Document Type from the dropdown (e.g., SHG Certificate).
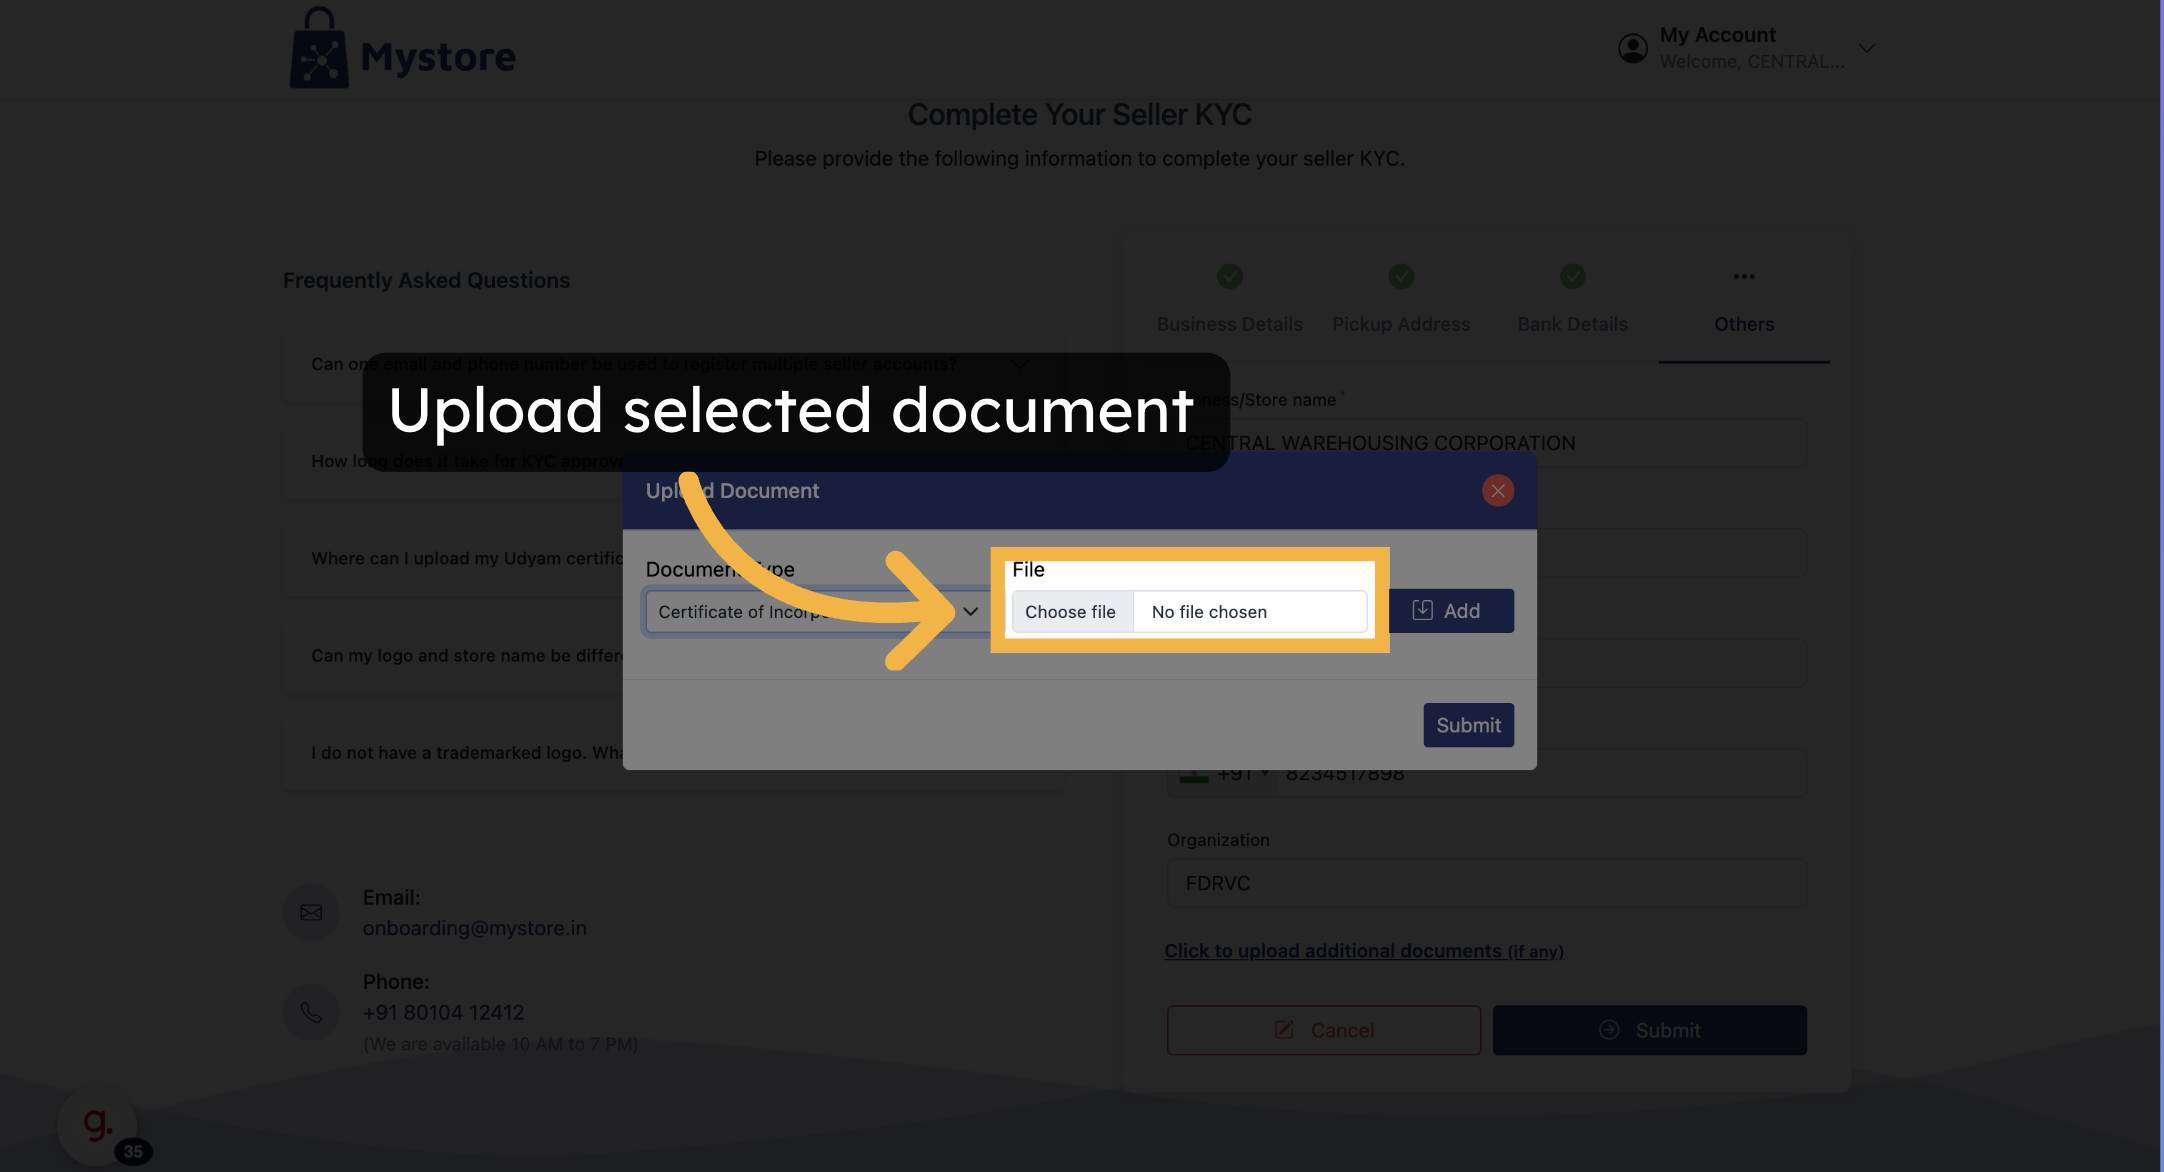
3. Click on ‘Choose File’ to upload the document from your device.
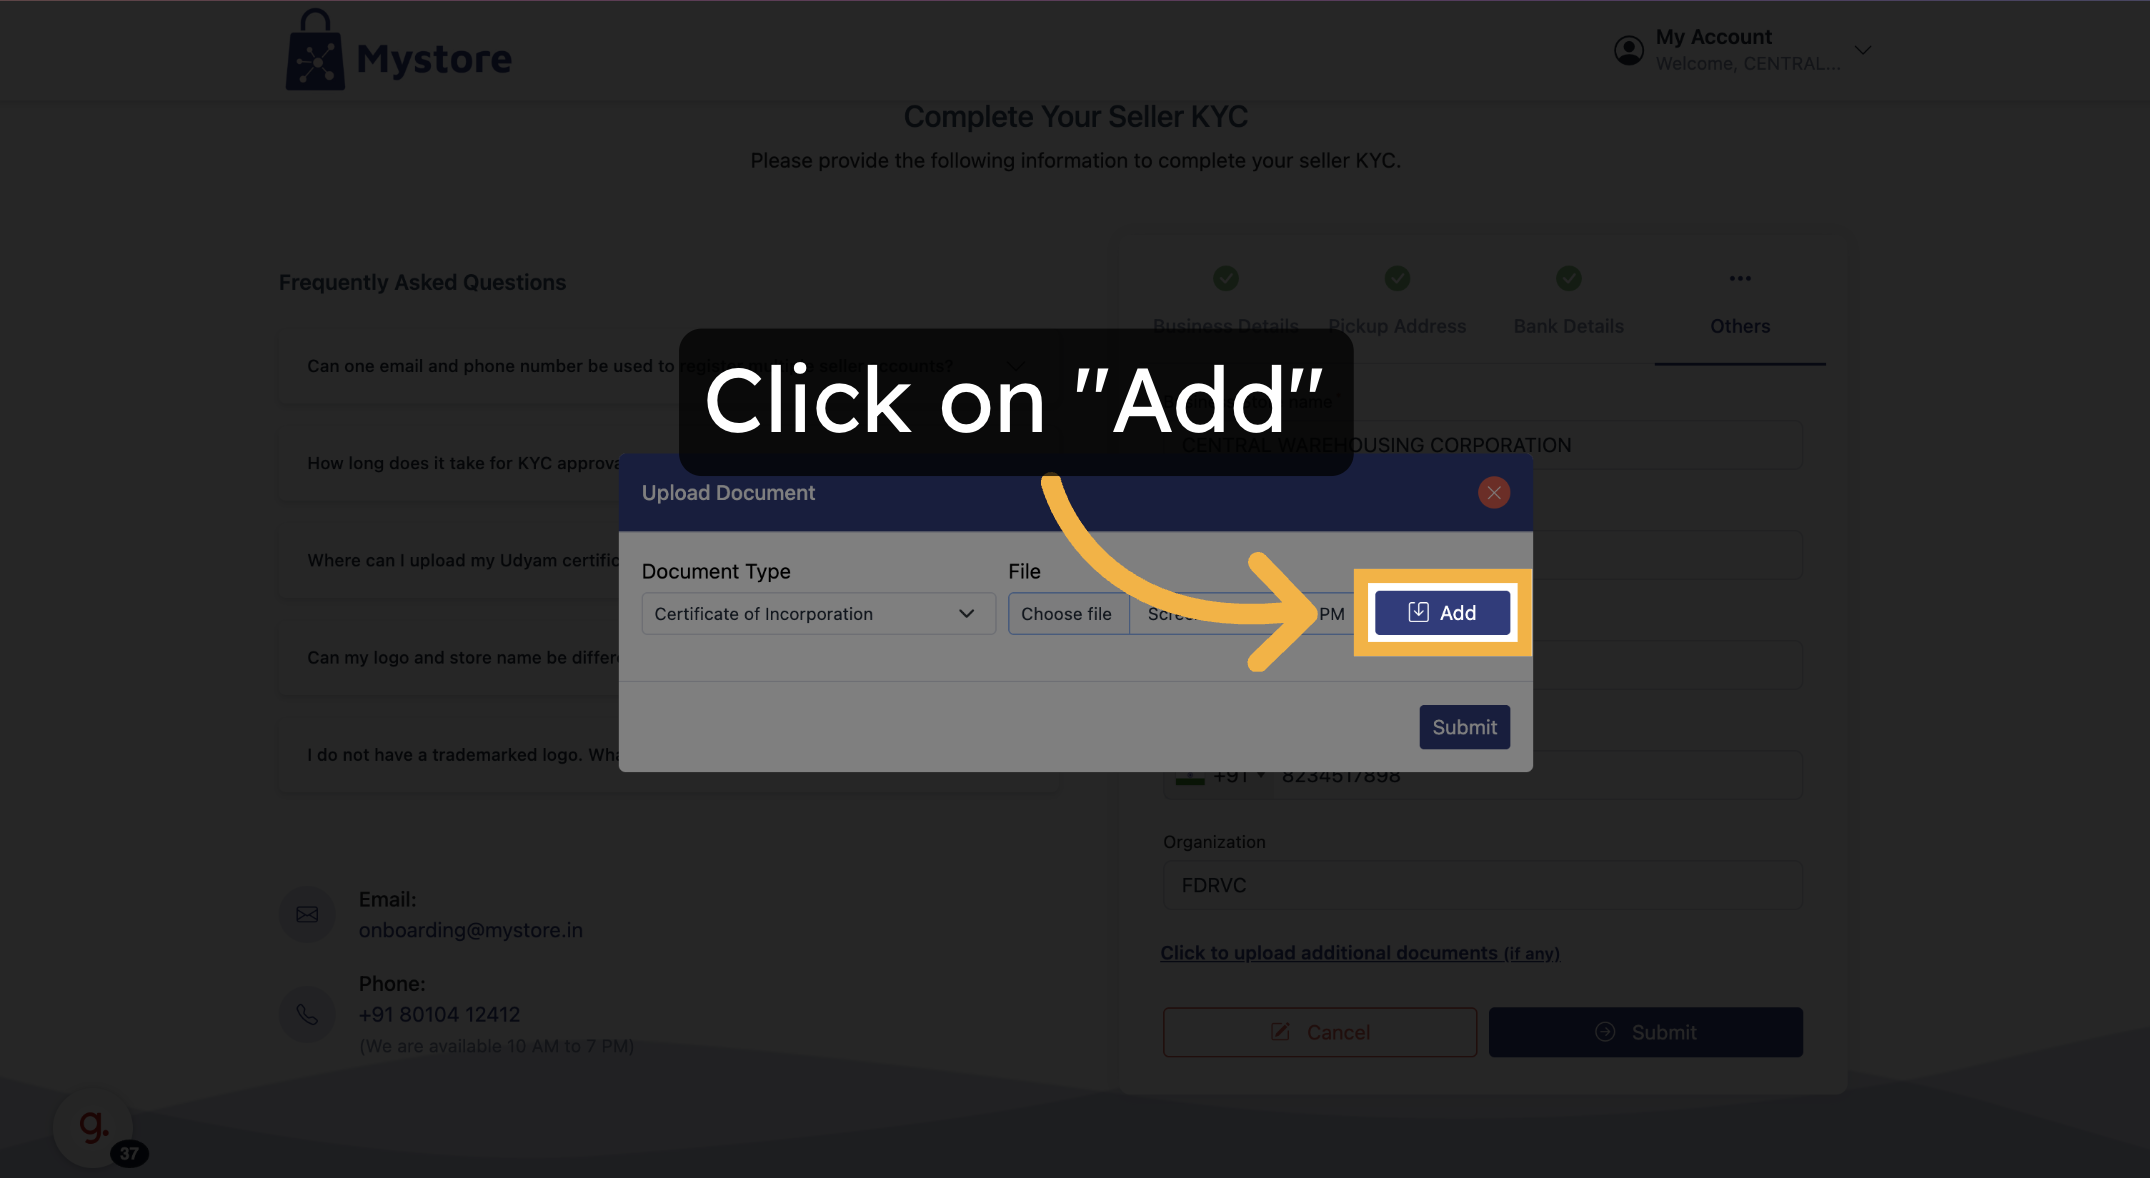
4. Click on 'Add' Button
5. Once selected, click ‘Save Document’.
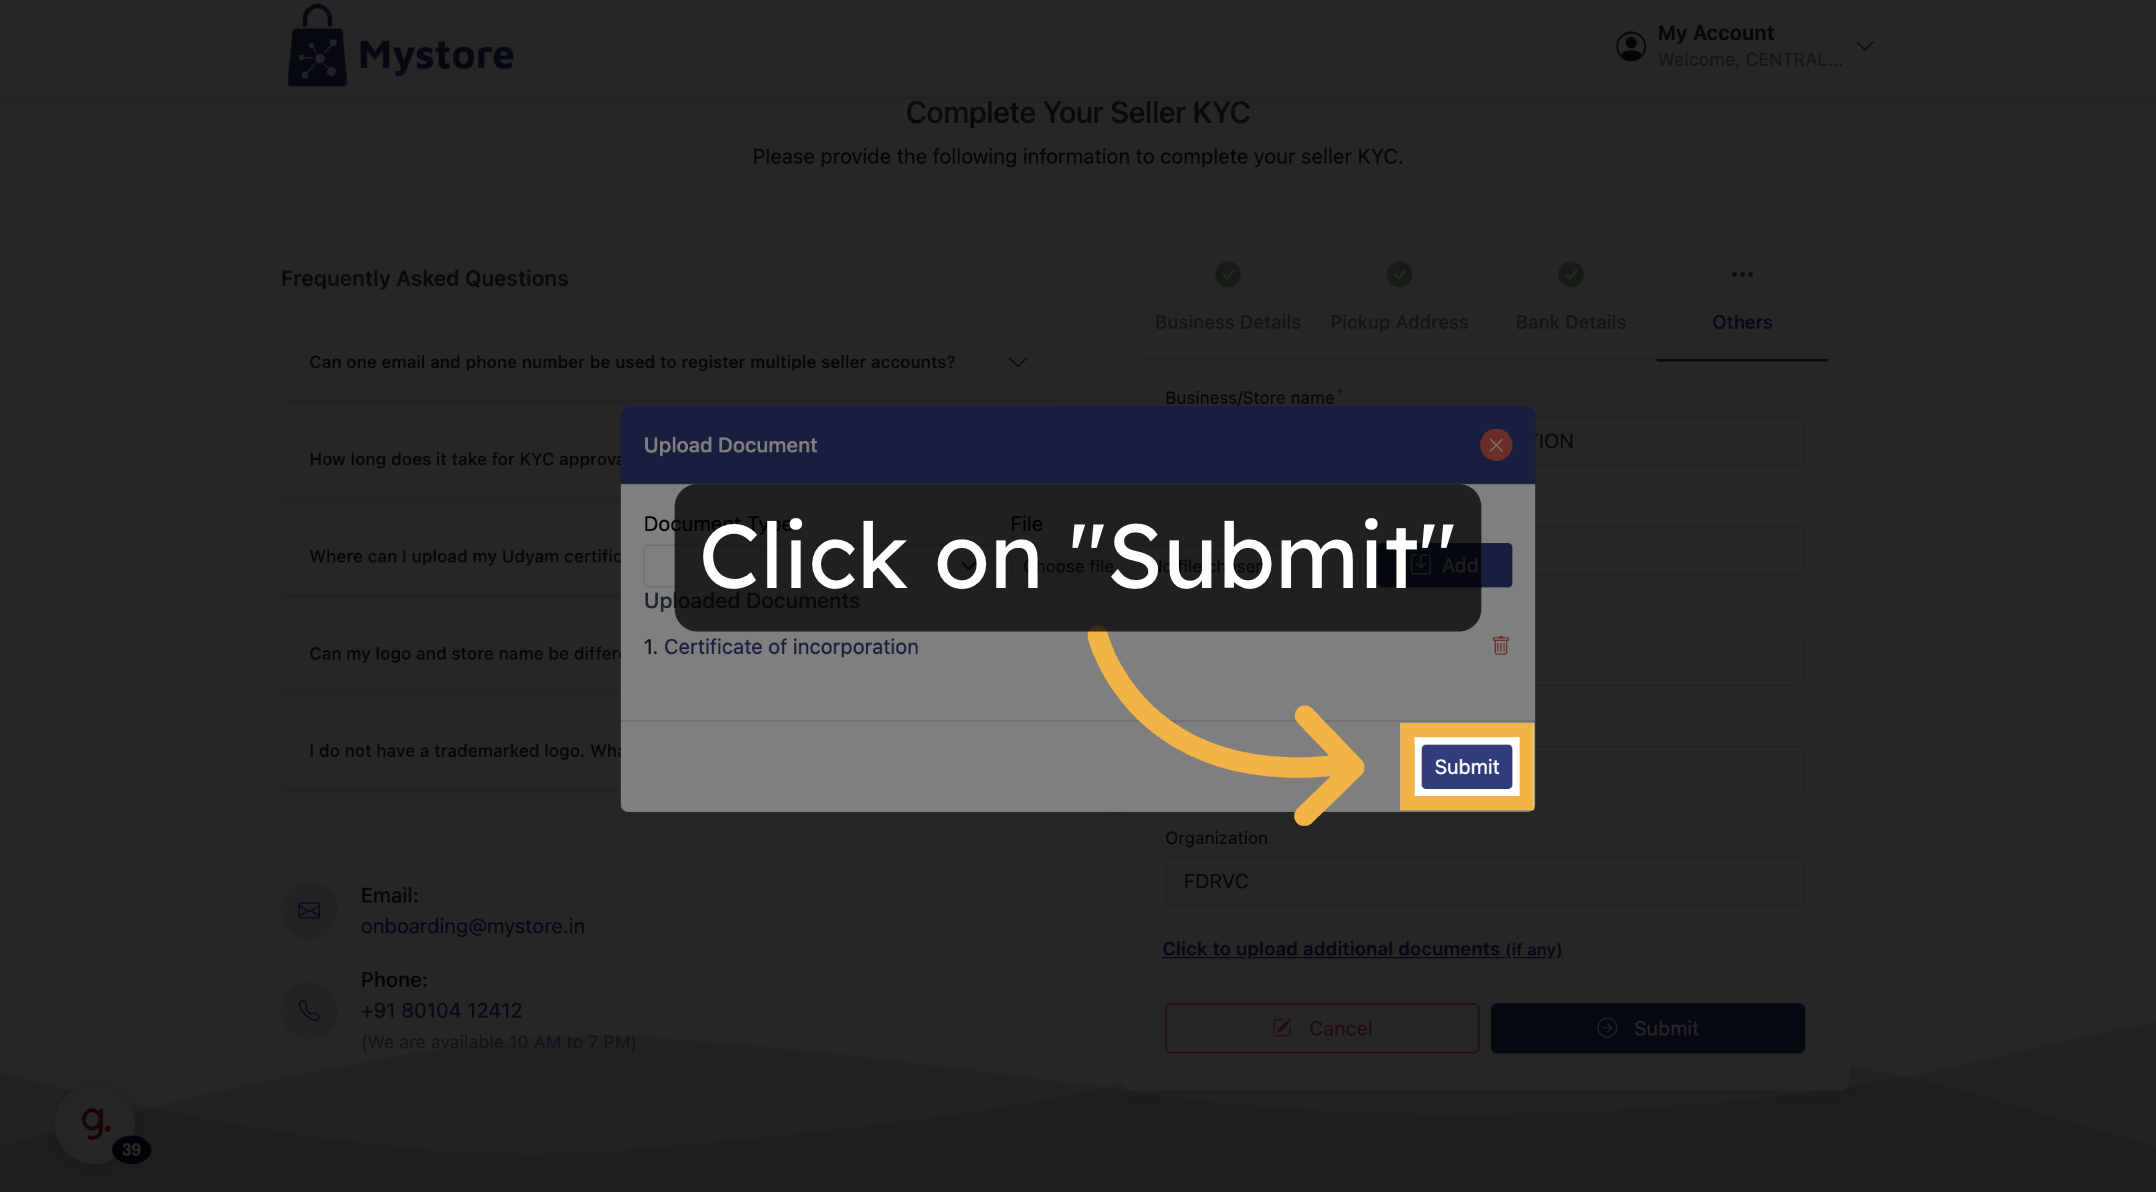
You can repeat this step to upload multiple documents.
When everything is complete:
- Click on the Submit button.
Confirmation
After submission:
- A message will appear: "Your KYC has been submitted successfully. It will be reviewed within 1–2 business days. You will be notified once it is approved."
- During this time, you can still edit your details if needed.


